Well, here is my summary of learning for our course this semester. I thoroughly enjoyed learning about social media and open education alongside my fellow classmates and Katia. I find these Edtech courses very important in education. Technology is changing and developing every day. I want to be an educator who is aware of these changes in order to better support the needs of learners now and in the future. I used one of my favourite educational tools, Canva to create my video. It is free for educators! I challenged myself to be on camera this time as it is still not something I feel very comfortable with. I want to be the educator who gives my students the ok to take risks in learning and not be afraid to try something new and step out of their comfort zone!
If someone had told me 2 months ago that I would be able to independently use a power saw, I would have thought no way and asked my husband to help me. Fast forward 2 months and I now feel confident using it on my own, especially for straight cuts. However, the process to creating my project is what I am most reflective of in this final post.
As someone who lives in rural Saskatchewan, I am forever grateful that the University of Regina has such a great selection of online classes for me to be able to complete my Masters of Education remotely from the community I live and work in. Online videos and open resources have made it possible for me to learn a new skill online. The videos and articles I read throughout my learning process guided me to gain knowledge of how to use tools, purchase materials, build my raised bed, and fill it with the appropriate soil and plants.
I often seek out information and learning online but have never tried to learn a new skill. Our topic of open education that was shared by guest speaker, Alan Levine really opened my eyes to how learning should be free and accessible to all. All of the information at my fingertips, allowed me to access free content to learn a new skill. However, I know this is because I have privileges that not all people in the world are able to access.
I found many benefits to online learning when completing my project and a few challenges. This chapter in the open access book “Student Success” by Mary Shier shares a great list of the pros and cons of online learning. Here is my reflection of how my learning online went over the course of this term. I prefer to think of them as Strengths and Challenges as I did not see any cons in learning a new skill online just some challenges to be aware of:
Strengths:
Flexibility of learning-I could spend time researching and building around my work and home schedule
Accessing information easily-I was able to access a vast amount of information to support my learning using articles, videos and blogs from professionals.
Choice and Interest-tailoring my interest and allowing me to pick what I wanted to learn about made this project highly engaging and increased my self-motivation to work on it.
Learning style-I am a visual learner so I appreciated the opportunity to watch videos and spend time working with my husband to complete my projects. I would have had a difficult time if I was only allowed to read articles about the skill I was trying to develop.
Cost Effective-being able to learn a new skill for free was something I have never pursued. There was no fee to join a class or access a webinar online which I appreciated.
Challenges:
Limited resources-Something I discovered throughout my project was that although I could access great information online regarding materials and the soil I needed, it was not readily available to me in my rural community. This did add up in costs from my initial plans
Self-Motivation-I really had to push through and commit to completing this project as a new Principal this Spring.
Knowledge does not equal Skill-I realized very quickly that although I could read all about how to build a raised garden bed and watch videos to learn new information about the skill I was trying to develop, this did not equal me being able to easily apply my learning ie. using a drill and being able to cut precise angles.
Revising my learning-I had to be prepared to revise my initial plans and ideas to make it fit better with my environment and personal needs.
As I reflected on my learning process to complete my learning project, all of these strengths and challenges could be easily part of a students’ learning. Learning doesn’t always need to occur within the four walls of the brick building structure known as a “school”. Students can learn in different environments based on their learning needs and interests. This process made me recognize that we would like students to develop new skills but we need to be aware that there will be challenges along the way. I think the most important piece I take from this whole process is that knowledge does not mean you will be skilled in an area. In order to develop a new skill, you need many opportunities to practice and apply the knew knowledge you have gained. Only then will you see the growth and development of learning. This is a critical takeaway that I will be reminded of when asking students to complete independent projects. They will need time to gather their knowledge but I must also make sure they have the opportunity to practice and and apply what they have learned.
In closing, I am grateful that I have tried something new and am developing a new skill. I feel more confident to tackle another project in the future (maybe next summer). I am pledging to no longer be just the board holder/helper but also an active participant in future household projects! My little garden bed is growing and developing just like my own skills this term. I leave you with a final look (and my first Tik Tok) of my raised garden bed project as I added mulch for extra moisture and some solar lights for a little aesthetic appeal.
It is time to wrap up my Major project for #eci831. My garden has grown, and I have grown in my gardening knowledge and in the way I can navigate the internet, apps and a variety of platforms to learn new things.
Final garden tour complete with real bird sounds!
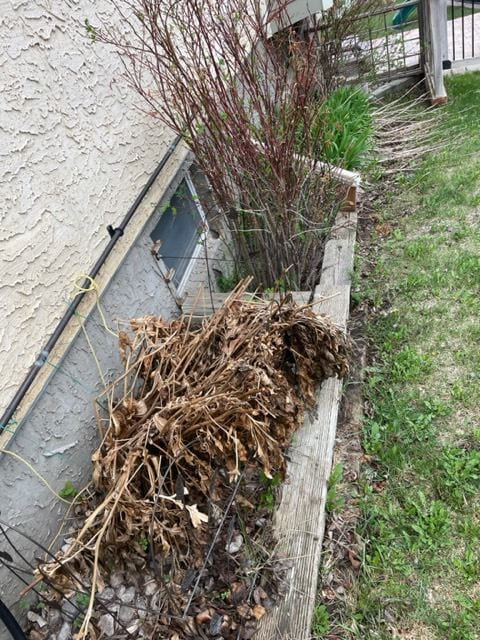
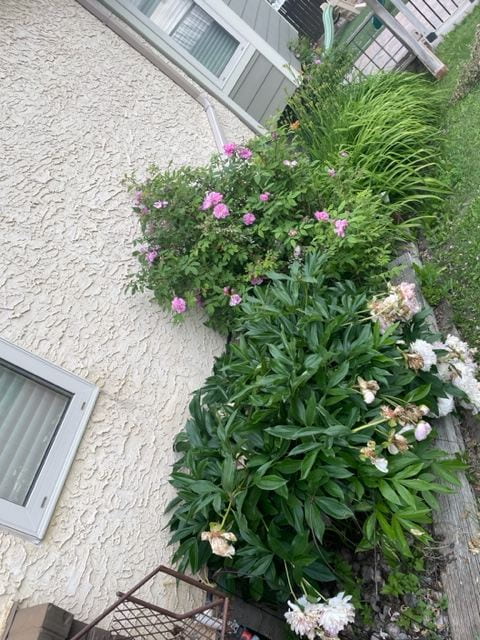
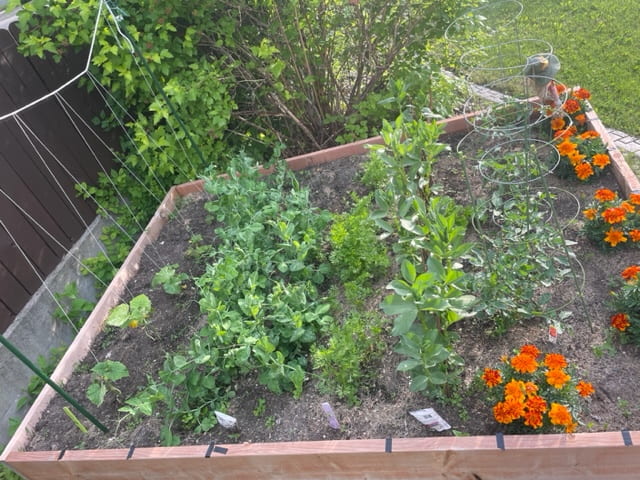
Before and After photos sum up the work that has been done. The part that I am most proud of is the vegetable garden. It was planted with thought, research and intention. The plants have been paired with others that will encourage growth, the proper seeding directions were followed and the placement of the plants was carefully considered according to my research. I can’t wait to see what the final product is! Regardless, I love watching the garden grow as there are noticeable changes every week.
Before- not knowing what everything is.
After- I have now identified all the plants and know how to care for them.
Before
After
Before
After
Before
After
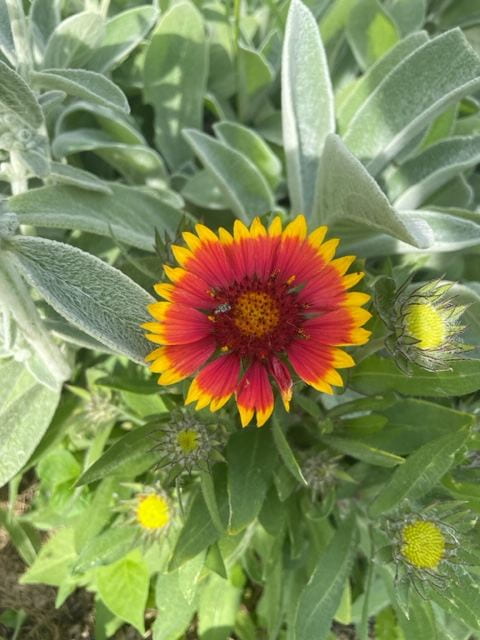
Final mystery plant bloomed this week- Blanketflower (Thanks to Virtual Look Up on my iPhone.)
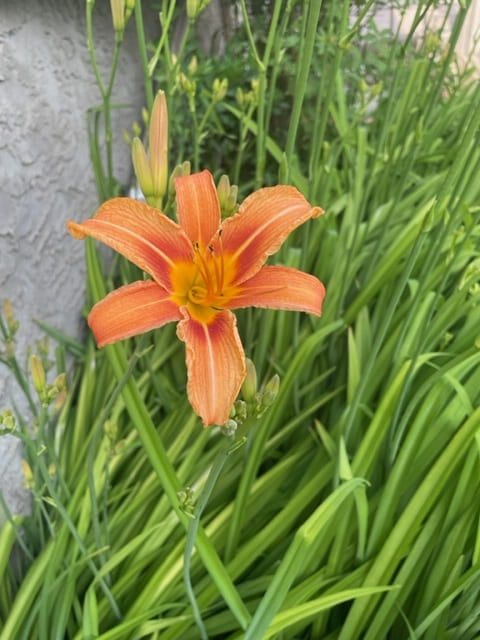
First Day Lily bloom this week.
My favourite sources for this assignment have been: Feedly, TikTok, Youtube and Twitter.
This week took a turn for my family. My mother-in-law passed away suddenly and unexpectedly. We needed to drop everything and head to Ontario to be with family. Fortunately, my in-laws were recently in Saskatchewan to visit during May long weekend. At that time, we shopped for our plants together, had a crazy chat about manure and discussed how our gardens are similar but also very different as I don’t have to worry about the deer eating my garden!
Last week, I was able to connect further with my father-in-law while helping him with the garden. Letting him know what plants were growing and how he could care for them going forward.
In my previous posts, I mentioned No Mow May and other suggestions that I have found about maintaining the lawn and attracting pollinators. When I was walking around my in-laws’ yard I couldn’t help but notice how special their yard looks with wildflowers as parts of the lawn are cut less regularly.
Photo was taken at my in-laws in Ontario
After a week away from my yard, I am thankful for underground sprinklers which watered the lawn as well as the perennial beds. My brother and his family kindly kept my vegetable garden watered every other day which only left me weeding and grass mowing after two weeks of growth.
My research this week concentrated on pruning, identifying plants and planting cucumbers.
Garden tour.
Pruning
Poppies– Once the flowers have bloomed you are to cut off the stem, deadhead, so that new blooms can possibly come. It also looks much neater. I missed many of my poppies blooming this week however, there are still a few buds that I hope will open this week.
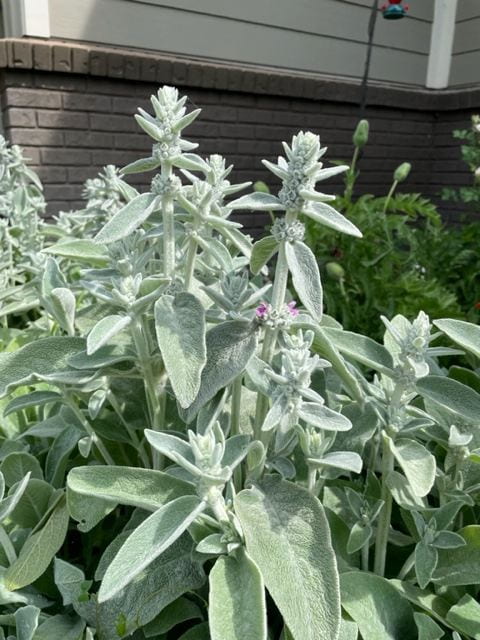
Lambs Ear– Similar to the poppy, when the purple flowers in the middle have finished blooming you will cut that stem off right at the bottom and you will be left with the fuzzy leaves.
Tomatoes- I cut the leaves off the plant that are touching the ground and a few inches up. This is to help the energy go to the main stem to produce larger fruit. It also helps with the airflow. The next stage of pruning is to remove the suckers. My plants aren’t large enough for this yet. @perkyplantparent on TikTok
Plant Identification
I went back to Facebook’s Saskatchewan Gardeners page to identify the last mystery plant in the front perennial bed. I was not disappointed as they came through again. It is a Veronica and Saliva.
Veronica
Saliva
Cucumbers– The almanac suggested that the window for planting cucumber seedlings in my area started Thursday, June 15th. I got mine in the ground today. I purchased three plants a few weeks ago but hadn’t put them in yet. They didn’t get proper care this last week so I purchased three more today just to be sure but planted all six. I had been searching Tiktok for information on planting cucumbers. Many videos were saying to plant the cucumbers with a vertical trellis to encourage the plant to climb. I decided to plant them following the advice of @notjustgreenfingers, the video below. I also found lots of helpful information on Youtube.
To end off the weekend, I picked the rhubarb from our back garden bed. I brought this plant with us when we moved one year ago this weekend. It produced 4 cups of chopped rhubarb, exactly what I needed to make a special rhubarb crisp for our Father’s Day dessert.
See you back here next week for the final wrap-up and before and after comparisons. The neighbourhood cat must be up to something else as I haven’t seen him in my garden for a few weeks.
Read that title again: Reuse, Revise, Retain, Remix and Redistribute. These are the 5 R’s that go along with Open Education. Thinking about those 5 words in an educational context is exciting = Sharing. Having free resources to change or alter to fit your context and then share them again when you are finished, I like how that sounds.
Of course, I have questions. The first questions that come to mind for me are:
What are the implications of Open Education?
How do you know the quality and accuracy of the resources?
This video helps point you in the right direction to have a better understanding of Open Education and where to go to get some of the questions answered.
From these videos, videosshared in class and our discussion with Alan Lavine last week here is what I have come to understand:
Open Education prevents outdated information specifically in textbooks.
Open Education saves A LOT of money on textbooks making it more accessible to more people worldwide.
Quality education for everyone.
We have been doing it for a long time without knowing- taking clips from movies and putting song lyrics to them.
Making student assignments more meaningful by sharing them, getting feedback and allowing others to build on them.
A question that keeps repeating itself for me is the fact that it is making education more accessible to people worldwide however, if technology is not accessible to everyone worldwide how do we reach everyone?
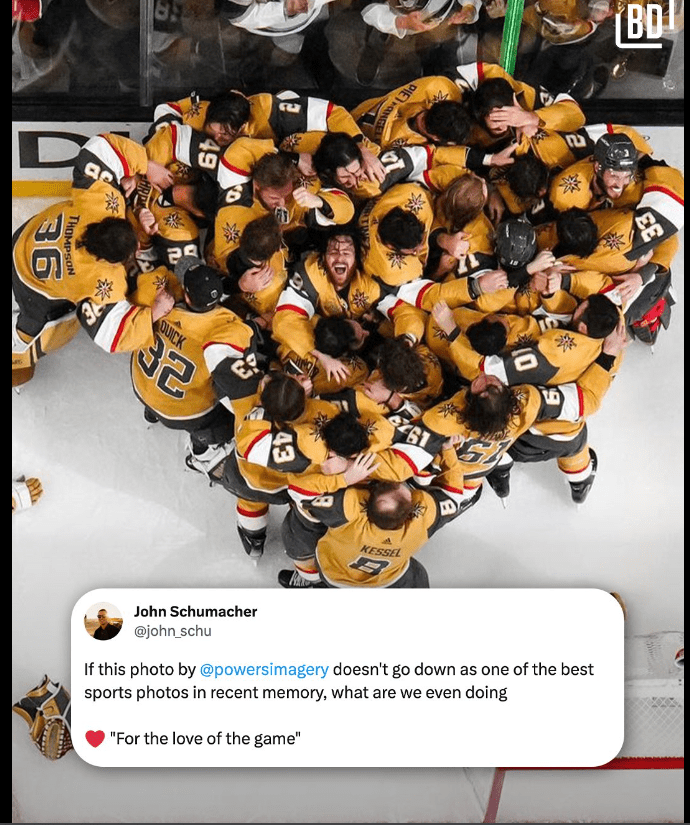
I believe very strongly in Teamwork. It’s important in my everyday life, family, sports and teaching. We shouldn’t be a lone island nor should we have to reinvent the wheel. Open Education, OER and Open Pedagogy seem to fit well into the idea of teamwork. For the love of the game or for the love of teaching, teamwork makes it happen.
My understanding is in progress but I can start small. I will continue to share my resources with my colleagues and start thinking outside the box about student assignments and how they can be shared keeping privacy in mind.
Here are some accounts that I have found on Twitter that will be helpful for an Open Education learning journey:
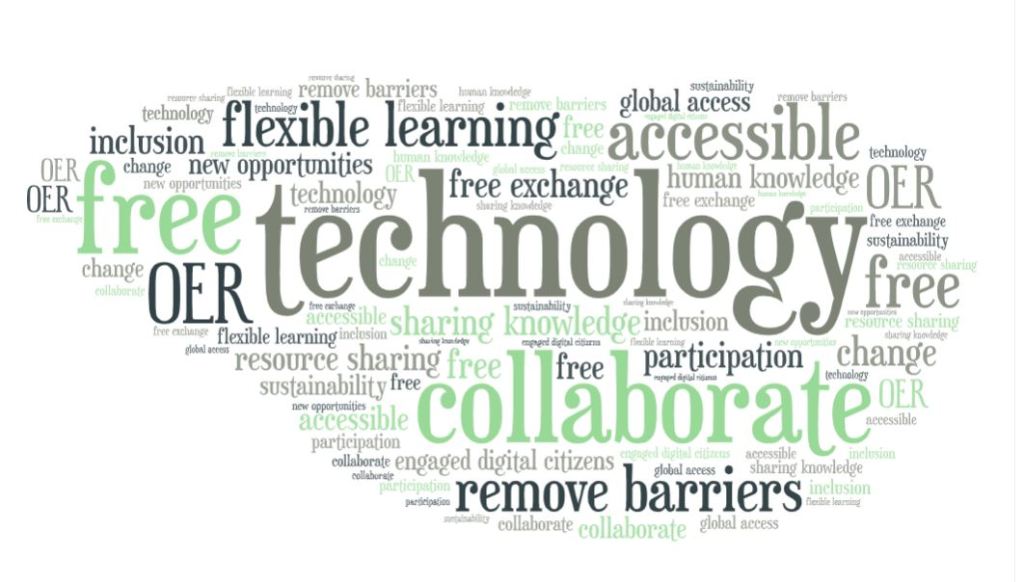
This past week our class learning topic was centred around the pedagogy of open education. Our guest speaker, Alan Levine challenged us to find our own definition of open education. So of course, I took to google to begin my research. Year of Open compiled a great list of definitions around what open education is from a variety of sources. After combing through the definitions, there were a variety of terms and words that stood out to me in regards to what open education means.
I believe that open education works for the common good. I see open education as a way to remove barriers around education and make learning accessible to all, giving opportunities to someone that may not have had access to technology or information before. As a person of privilege, it is my responsibility to help build opportunities to those that may not have access to learning. Being equitable in giving opportunities around education is what open educational resources allow.
When I think about access globally, it makes me excited about how opportunities have grown for those in countries driven by poverty and war thanks to open education. However, it still makes me question how far we have yet to go to make education truly accessible to all. The pandemic put this into perspective for me. Students from my school were able to take a device home for online learning. However, this did not guarantee learning for all. Some of the barriers included, no internet, low bandwidth, a child not being able to log on independently because they were small, parents having to work and not being able to support their child’s education.
I don’t want to discount how far we have come. I believe open education is moving in the right direction. Global access to education is increasing. For myself, I feel very fortunate to have had opportunities to take courses from Harvard edX, listen to speakers from other countries to develop my skills as an educator, and complete my Masters of Education from home as I continue to work and live in rural Saskatchewan which was something not fully possible even 10 years ago. Connectivity to learning globally is growing exponentially. The Podcast featuring Sarah Kresh and Alan Levine provides a great example of how open education is working. I enjoyed listening to how moving away from textbooks to open access is impacting learning globally to remove financial barriers.
Open education is something that I can start with at a local level in my K-12 context. As an administrator, many of my students and their families struggle to make ends meet, therefore, I aim to remove barriers around a child’s educational experience. Some of the areas that I put first are ensuring food security during the school day, ensuring they have basic needs met, removing the barrier of having to purchase school supplies, providing opportunities for open learning through project based learning, accessing virtual guest speakers, and providing technology access to all students during the school day.
Open educational resources not only applies to higher education but I believe could make a positive impact on K-12 education. Teachers can utilize OERs to access free resources to use in the classroom and customize to meet the needs of individual learners. Students can gain access to information to learn and create innovative projects through technology which used to only be found in textbooks. However, part of digital citizenship is teaching students to be critical of the resources they find online to ensure it is reputable and factual. Open education allows students to develop their 21st century skills in a world dominated by technology.
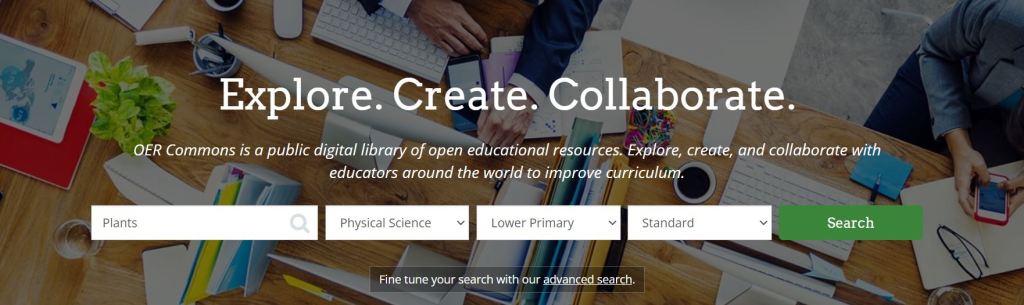
One of the best OER websites I found was OER Commons. I typed in the search below and found a wide variety of lessons regarding plants that teachers could tailor and customize for their students.
Educators no longer have to work in isolation. I believe collaboration and sharing resources is key to creating stronger systems in education. Teachers need opportunities to find free resources online, share resources with other teachers, and collaborate not only within their schools but look for other educators to learn from globally. In the early 2000s, professional learning communities were developing and growing in the world of education. However, due to budget and time constraints it started to lose momentum. I believe it is vital for educators to have opportunities to collaborate with others within their work day. Therefore, one of my goals for my school moving forward, is to plan and provide time for teachers to meet together weekly to learn from each other, share resources and collaborate to develop engaging lessons for students to access. I hope to help them navigate open educational resources to find new resources to support students and remove barriers.
Open education helps educators develop and grow their learning and educational resources. This in turn impacts the students we serve and even children around the globe we may not have even thought could get a chance to access education because of this movement .
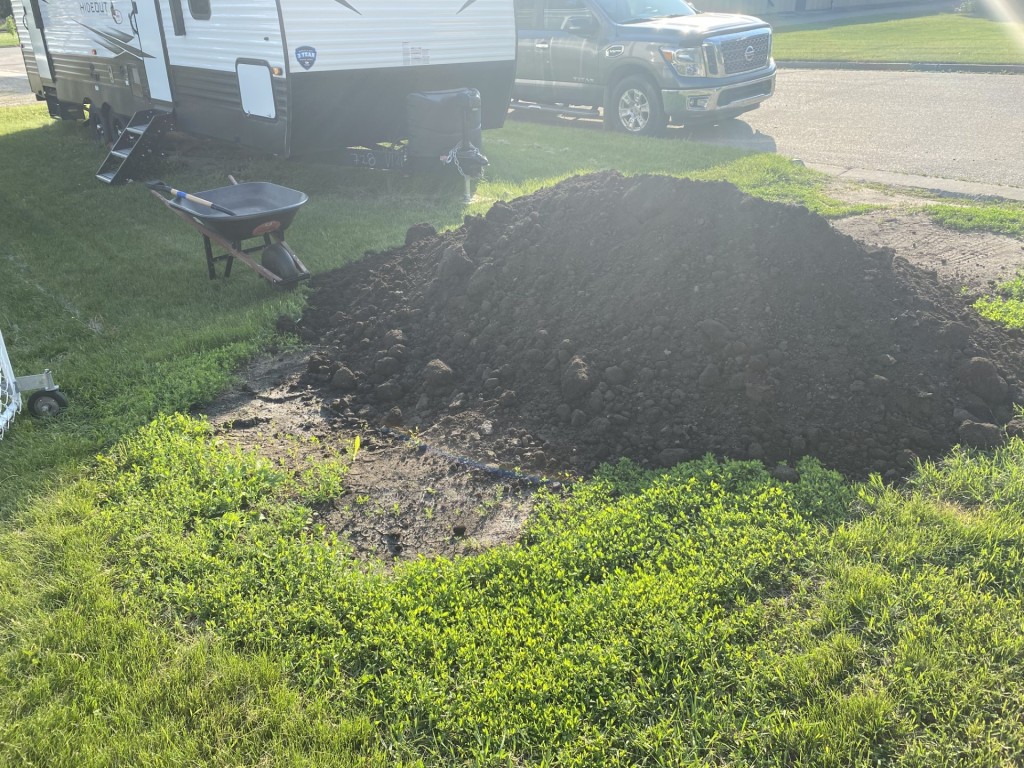
Well, the good news is that my raised garden bed is built, but my oh my how am I going to fill it and what should I fill it with? Once again, living in rural Saskatchewan presented a bit of a problem when it came to finding what I would need for soil. Buying bags of soil was out of the question as I would have needed far too many and that was out of my budget since I had splurged on the cedar boards to build the bed. However, I did some research to try and figure out what type of soil I should use to help the plants grow. This article “Everything You Need to Know About Gardening in Raised Beds” provided lots of great tips about soil and planting in raised beds. Something I took away is that I would need to buy in bulk as I would need several yards of soil to fill my bed. I decided to buy dirt from a local business which was a mix of soil and manure. My plan is to add more nutrients to it every year to provide the plants optimal growing conditions. Here is video I found that is all about…well I’ll let you investigate!
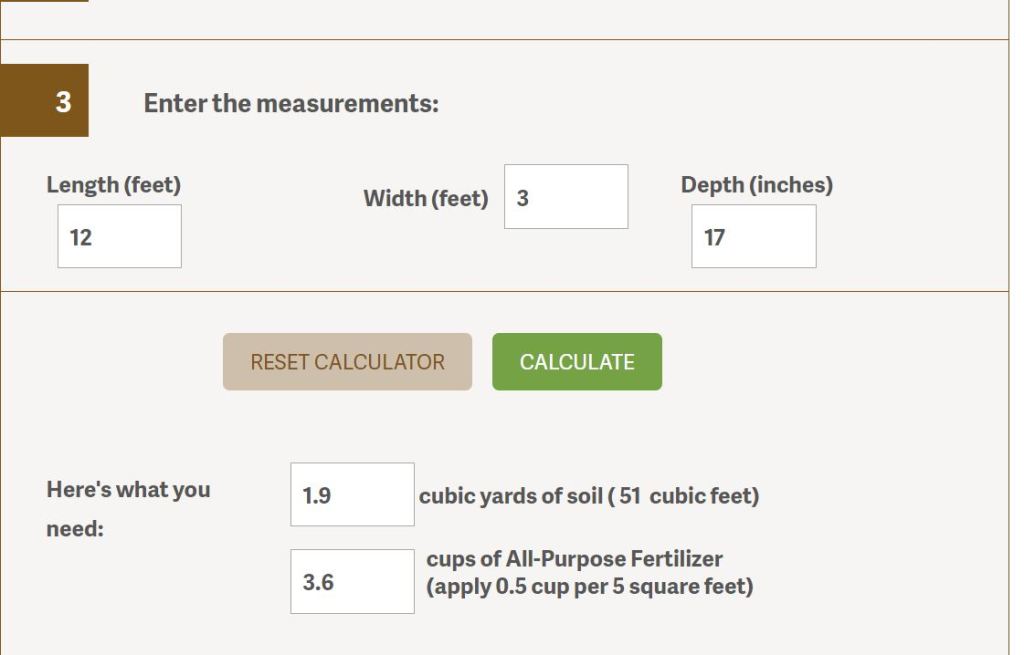
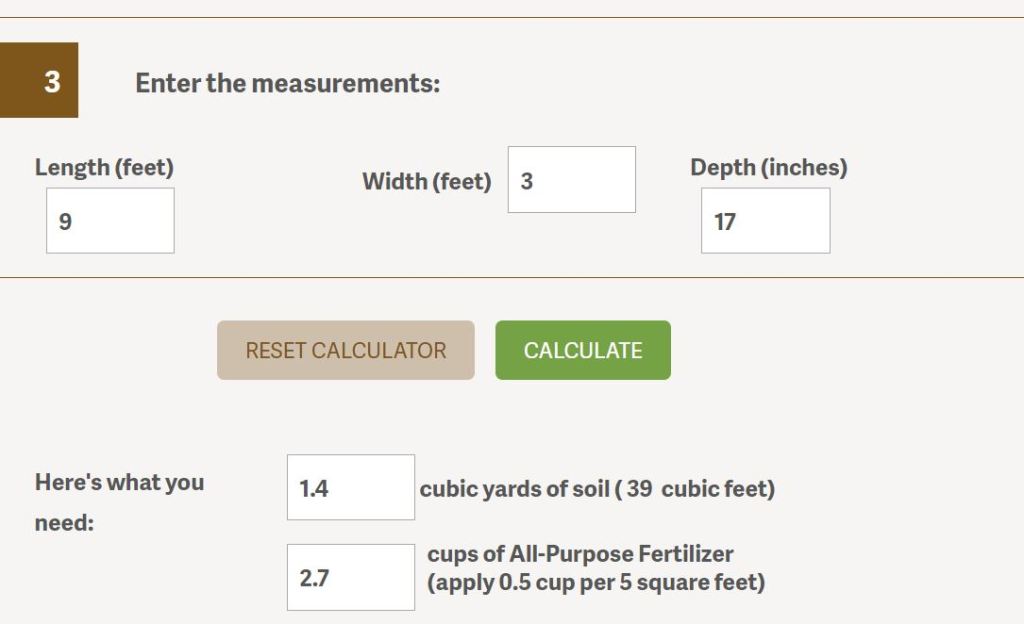
Along with my planning and designing, I have had to learn some new skills at math. I had to figure out how much dirt I would need. I found the Soil Calculator a great site for figuring out how much dirt I would need to fill my bed.
Oh boy! It turns out I needed around 3 yards of dirt. After work one day, I came home to this!
3 yards of dirt and manure mixture
Before starting to put the dirt in, I needed to take care of the grass at the bottom of my garden bed. I chose to put a layer of cardboard at the bottom for two reasons. First, cardboard will naturally decompose and become part of the soil. Second, I had used landscape fabric in the previous garden beds my husband built for me and now every year I am battling grass coming through at full force! This is a great video regarding the pros and cons of using cardboard in a garden.
Adding the cardboard in my raised garden bed.
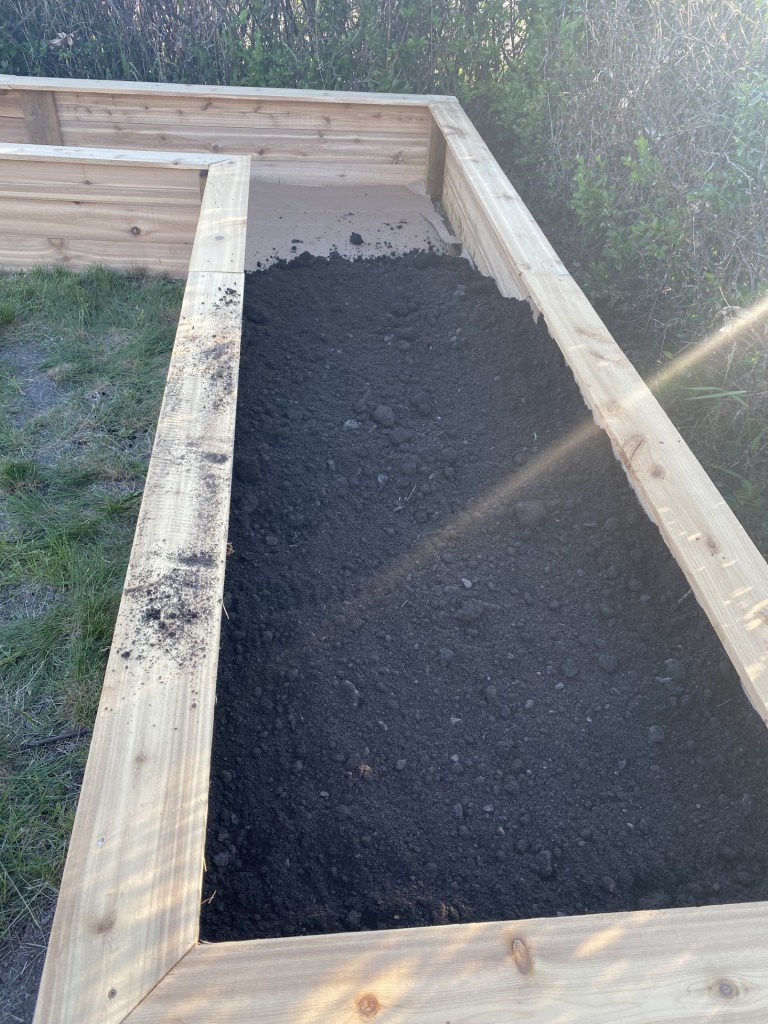
Once the cardboard was laid down, it was time to get busy loading, hauling and dumping the dirt into my raised bed.
One evening worth of work!
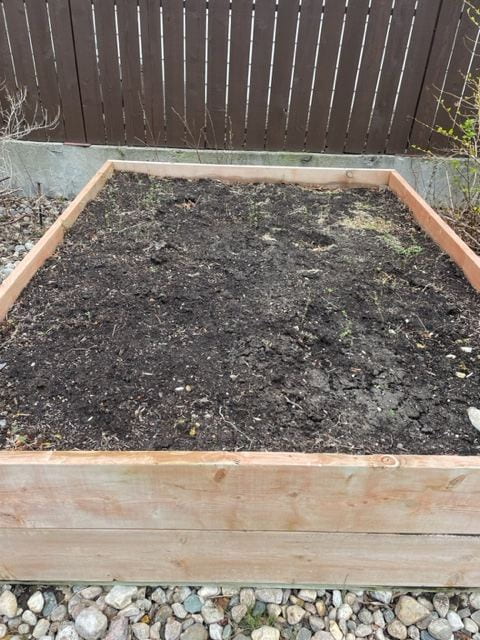
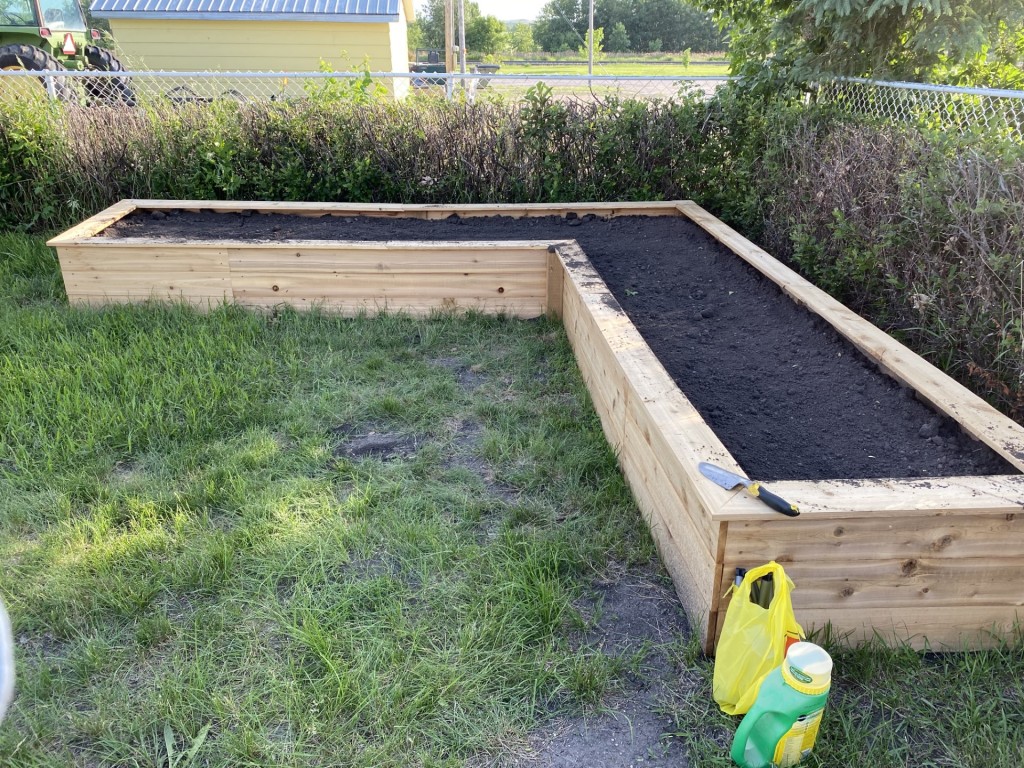
It took two evenings to fill the garden bed! I was so happy to finally start to plant!
Time to plant!
I have big future plans for my raised garden bed to become a spot for fruit bushes such as strawberries, raspberries and rhubarb but this year I was not quite ready to tackle this plan. So, I decided to start small. I chose to plant tomatoes and peppers of different varieties along with some flowers and a shrub. One plant that I had heard great things about to include in gardening was the marigold thanks to Laurie’s blog. I always wondered why my grandmother included them in her garden every year. Here is a short video that shared 6 reasons you should plant marigolds in your garden.
After purchasing my plants at different greenhouses, I set out spacing them out first before planting them in the soil. This is something, I would do again in the future as it gave a great visual of how much space each plant needed to grow. The soil was very workable and easy to dig and plant in. Here is a video with my raised bed finally planted!
The raised bed is planted!
Overall my learning project went well. So things I hope to do in the future to make it even better based on my research is:
Adding more minerals and nutrients to the soil
Looking into watering systems
Researching how to grow fruit in raised garden beds
A couple of things I need to remember in the future:
Remember you live in rural Saskatchewan, products and resources aren’t readily available
Think about where your garden is located in proximity to a watering source. It is going to take all of my garden hose to get water to this raised bed.
Start early thinking about plants. I was not able to get all of the plants I wanted in my garden bed as I was late at planting this year.
Up next week, the final wrap up of my major learning product which will include adding some mulch to help with soil moisture! Thanks for reading. I leave you with a youtube short I was playing with this week!
Can online social media activism be meaningful and worthwhile? This is the question that I have been reflecting on this week. When I look at my social media presence, it is primarily educational and inspirational content. I don’t post much of my own content instead I will share or retweet information that I find important in the field of education. Rarely, do I engage in anything that could be considered “activism.” My reason for this is that I am not a loud person in “real life” and I don’t want to be different online.
I was speaking with a colleague about this after our class trying to navigate my thoughts about social media activism. My colleague mentioned that even though I am not a “loud person” they know what I stand for because of the subtle things that I will do. This got me thinking, it is important to me to be the same person online that I am in real life. I can repost or retweet in my way for things that I stand for. This is what I have started to do. So, after much reflection, I believe that social media activism can be meaningful and worthwhile and I am going to try to participate more in activism online, in my way.
What is our responsibility as educators to model active citizenship online? This is another interesting question for me as I have a rule for my social media which is that I do not accept students as “friends” until they have graduated. I have always thought that I want to keep my personal life and professional life separated. This would prevent me from being a model of active citizenship online. The way that I feel I can be a model is by teaching my students and children about digital citizenship.
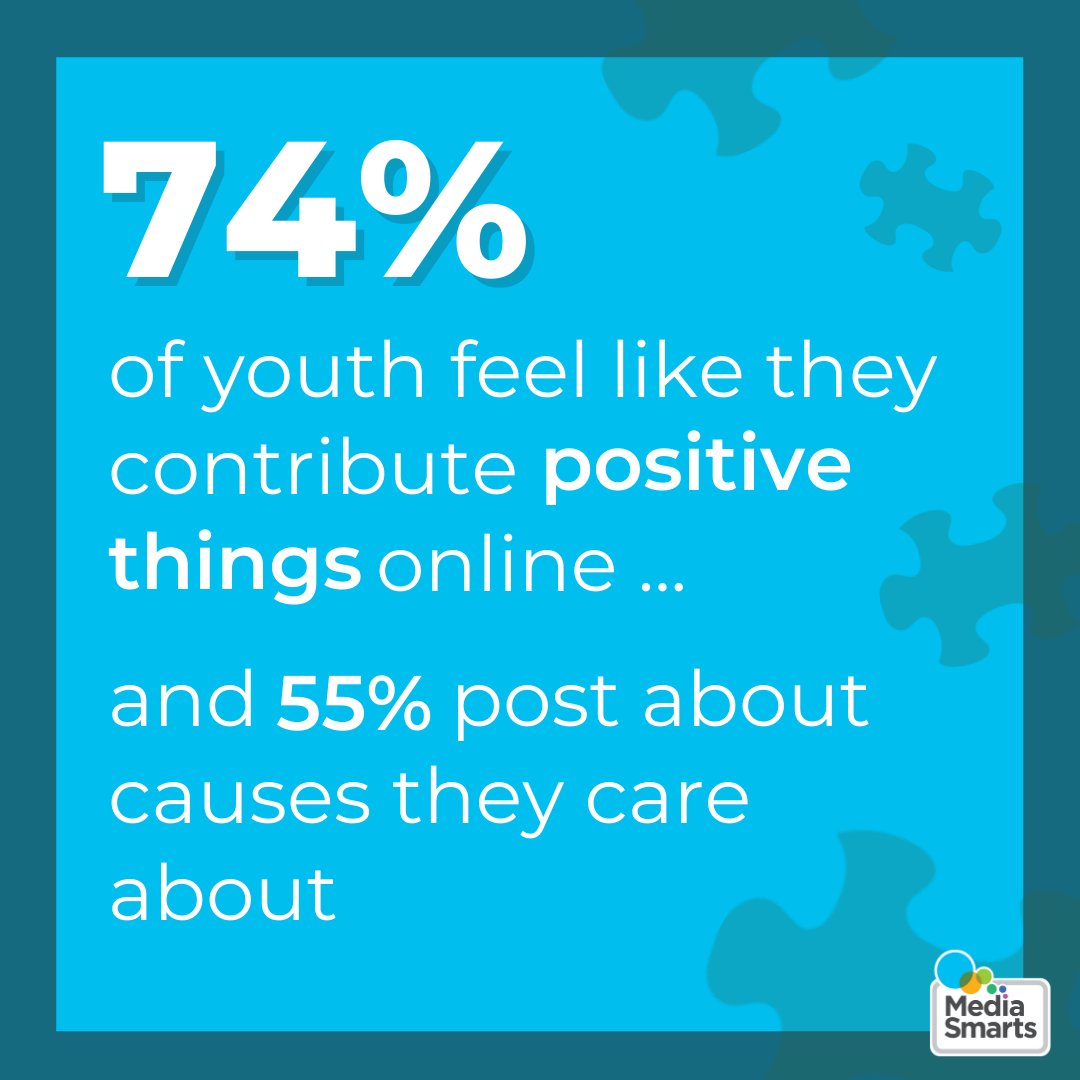
Here are some websites that have lesson plans and other useful information for teaching digital citizenship and starting thoughts conversations in the classroom.
Media Smarts- This is an infographic which shows presents findings related to digital media literacy and digital citizenship. This would be a great discussion for a middle years/ high school classroom.
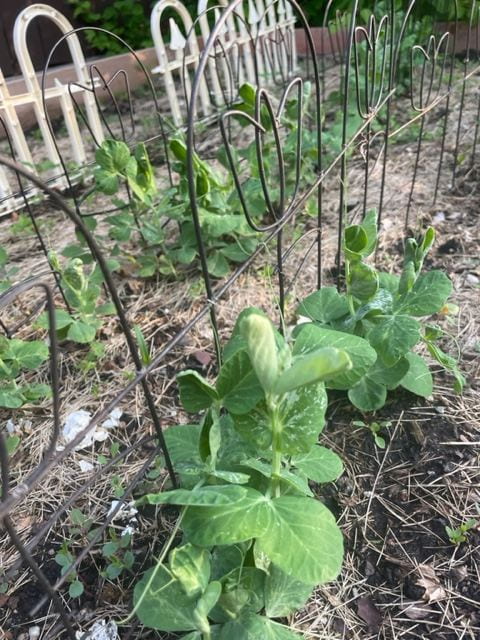
According to the 2023 Planting Calendar: when to plant your vegetables for my area, the window to plant tomatoes started this week. So, Wednesday evening once it cooled down, into the garden they went. See the video below to find out how I planted my tomatoes.
TikTok- Now that I am connected, I am going to stick to TikTok for everything Tomato. Here are a few accounts that I have really liked for Tomato content.
TikTok @jacquesinthegarden
TikTok @parkerpastures
TikTok @kia_urbangardener
Update:
The grass clippings, orange peels and egg shells seem to be keeping the cat out of the garden!
Finally, here are some updated pictures of what is happening in the yard this week.