Author Archives: Christine Bruce

Summary of Learning

This ECI 831 session was unbelievable, the learning that took place over this short one and a half months was incredible. I was able to learn a lot first about myself and social media, how I evolved my own sense of ownership, comfortability in usage, and the obvious learning through social media

platforms; check out my major learning project if you haven’t yet; I sing, I dance,

I make cake, how could you not love it?!?! I generally focused on using the TikTok social media platform to showcase my learning and OOOOOOH MY WORD do I need to give content creators all the credit in the world, it truly took me longer to make the TikTok videos then it did to actually bake/decorate the cakes. One day I spent over 2 hours just working with the editing tools, getting things to splice and slice and find music UH. I was exhausted so kudos and all my respect to anymore who makes a living based off of social media videos; they look easy but man do they take work. I am really happy to say today I tried something new and I took my summary of learning TikTok video and uploaded it to YouTube so I did not have to make it public for everyone to see on TikTok; to be honest I really do not love that I have no control over who sees my TikTok videos; I wish there could have been a way that I could share it to people and they could view it only if they had the link or something along those lines. I was quite proud of myself for dipping my toes into uploading a video onto Youtube. I am sure Youtube has much more to offer then what I did but I am very happy with it. Secondly, the weekly blogs from the class really gave me some things to think about and I have learned a lot about myself through blogging and I felt I could showcase “me” a little more in my work rather than needing to be who I think my professor wants to be and and write how I think they want me to write; this was freeing and liberating with an academic purpose and I very much liked it.

Besides talking about “me” because that it always selfish, I would like to say that learning

about how social media, open education, AI & all other technology topics discussed can play a role in a classroom was pretty profound learning for me.

I have loved learning from all of you!  When you click my google slide link below please hit present and the magic will just happen.

https://docs.google.com/presentation/d/1LPl21aVKx5WRVtGRSuu4t21HSpW8T7TxmLjrzWXlMxc/edit?usp=sharing

Much love,

~Christine

Chocolat Eh? Chocolat Eh? It’s Been A Slice Y’all!

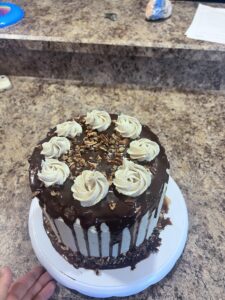
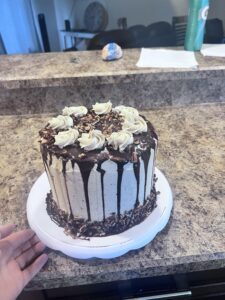
Here it is folks, here you have it! My final videos of my major learning project. The cake I made today was Turtle Pie Cake

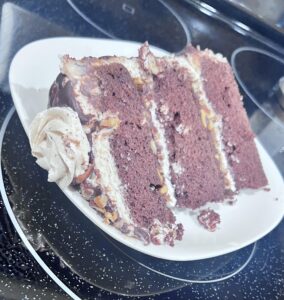
Turtle Pie Cake with Chocolate Cake, Salted Caramel and Pecans”

Turtle Pie Cake – tender and moist chocolate cake layers with salted caramel, toasted pecans, chocolate ganache and pecan buttercream.

I chose to use Tik Tok as my platform for showcasing my work as a continuation from ECI 832 when I first began to explore TikTok. Last time I learned the basics and was exploring the tools. For this class I wanted to use the platform to show my learning throughout the process of this project, and toil with the idea how TikTok could potentially be used in a classroom to show students work. Although at this point I won’t use TikTok with my students until/ if ever there could be a TikTok created that is specifically dedicated to school use only. Wouldn’t that be fun? It could follow all the safety precautions, and be monitored easily, only have access to certain features… a girl can wish!

I broke my final project into 2 stages: the first being baking the cake from scratch which was a whole aspect I did not plan on learning to do when I chose cake decorating but it had to happen so I feel like this project was actually 2 learning projects instead of 1. The second stage was the decorating.  Todays cake was much more extreme than the other cakes I have made. This was required a homemade caramel sauce, chocolate ganache, homemade pecan butter, roast pecans, and then the buttercream; it was a lot of balancing and playing with aspects I haven’t learned much about yet because those come in Cake by Courtney’s Advanced Decorating classes.

I did have to do some more research on my own outside of the beginner class because I wanted to add piping details to the top of today’s cake (which I showcased last week), click on this link if you want to see last weeks piping adventure called I’ll Take You To The Icing Shop, I’ll Let You Lick the Spatula.


Alright here is video #1, I will be honest I had to redo this TikTok video twice because I guess when I did it on Friday it did not upload fully and all I got was 7 seconds, I realized this when I went to create this post… Needless to say that was 2 hours of editing for nothing and another 2 hours to redo, I will be honest it’s not as edited as the last one but it’s all I had left in me and I am super frustrated…

Is it wild to realize that making the TikTok video took longer than actually making the cake?!?!?

Making The Cake:

https://www.tiktok.com/@christinebruce01/video/7246068886775270661?is_from_webapp=1&sender_device=pc&web_id=7231010881814808069

(I am even more frustrated that it is not posting here properly so all you are getting is a link to this video, sorry team!)

Decorating The Cake:

@christinebruce01

♬ Live Your Beautiful Life – Gray Griggs


Check out How To Cut A Round Cake Here and How To Cut a Tiered Cake Here

It’s been a slice y’all!

Christine

Have a Little Faith, Hold Out, “Open Education” Shall Be Free But For Who?

With the help and support of my colleagues willingness to share resources of things they have made with me, my life as a teacher has been made slightly simpler, enjoyable, more manageable, allows for more work/family life balance and I am a whole lot more appreciative of what it means to work together. Although these teachers who have made an impact on my teaching will never see this blog I want to shout from the rooftops THANK YOU!

https://www.flickr.com/photos/cogdog/9512459719/in/photolist-fuzQSc-AZWdGS-5CV12R-2kjxhqw-2ok3M8c-D9g1ho-RkNdB9-2ns6Tza-2kCo3Dy-2kJez1h-KC1bbL-Lk6uic-9ewUtU-2n2o79h-kgu1iG-nAxY44-Pq93vh-wph1Z1-ZAd1VQ-GXY8xW/

When I first began teaching before I made any connections with my colleagues I was putting in significant time in the classroom; I felt like I never left the school and I was a young mom who was then giving up time with my baby. Then one day a teacher walked into my classroom and commented on how much time I was putting in; she said something along the lines of what unit are you doing, I probably have something you could use. She walked out and came back with a unit to share with me; I cried. 

I vowed after that day that I would be a teacher who shared whatever I could to help others. Fast forward to this month when we got our new grade placements and then to specifically today, my across the hall teacher came to me and said “here I put all my grade 5 files on this USB, take a look, use what you want, or don’t” I never asked for this, he just gave. What a great feeling this was. Is this what open education could be like? Just sharing of products without having to put a denomination behind it?

I then go back to COVID and creating my own videos to share with students; usually had to do with math lessons that matched our Jump Math student books; the amount of time and work that went into creating these “semi professional videos” was extremely time consuming but I wanted my students

YouTube open on an Android phone
Image credit: Shutterstock

to have access to the information they needed. It was hard to video myself, my work, purley for fear of judgement in how I teach, my words, my voice, my background, my everything… I am a very self conscious person. I did appreciate having access to other peoples videos on Youtube that I could include about the outcome. Again is this what open education could be like? Free access to learning videos to help supplement teaching?

I am left wondering what if YouTube created a supplemental space for open education. A space for educators to go that has a great search engine for finding material based around teaching and videos to support in class & out of class education. Videos that are screened for appropriateness, education based learning, ad free, etc. Wouldn’t that be a wonderful space? I wish I could type in Saskatchewan outcome 4.1 number sense place value and I could get supplemental & engaging videos to show a concept being learned. A teacher can only dream right?

Why Open Education Matters video brings up some interesting points that education is not fair for everyone; which is definitely not a new topic at all, what I am wondering about though in regards to open education is how fair is this idea anyways? In the video it states that “Tundo”, who had big dreams and the education he is getting is based off of old information; his school cannot afford new books or the latest learning materials. Now stay with me here, what are the chances that Tundo will even have access to technology and the internet/band width that it will require to even access open education? There is a major disconnect here that will need to be addressed before Tundo can even get a better education, if I am speaking truthfully I am also really struggling with what may appear to be a white heroism perspective at the moment or that only the privileged will be able to access open education but I am hoping I am wrong and reading far to into it. The right intention is there but who will truly benefit?


I leave you with this thought, and I cannot wait to read your responses…

Do you think open education could replace teachers? If quality education can be provided to students anywhere for free and constantly updated with relevant information could it be a possibility? If Covid lasted years and years, could we have seen a significant change in teaching, and needing less teachers to provide instruction especially if content was made easily accessible on the internet and one teacher could provide lessons to many, many children at once?  Could teaching become a self checkout situation? Why or why not?

I’ll Take you To the Icing Shop, I’ll Let you Lick the Spatula

Nothing beats licking the icing off a spoon now does it? This posts focus will be on how to fill a piping bag and then practicing my piping skills not on a cake. There was also so many distractions today, not only did I have my children but my sister needed to last minute drop off her children for 3 hours. So throughout today there were moments that I needed to pause; the noise, the questions, the I need snacks, the parenting was all too much!

First on the batting order is How To Fill Your Piping Bag. 

I followed along with the tutorial but realized a few that one thing was missing and I needed to account for; the icing tip. The tutorial never included when or where to place the icing tip so I made an educated guess. Check out my TikTok video below of How to fill my piping bag:

@christinebruce01

Major Learning Project: How to fill a piping bag

♬ Sugar Sugar – Original – The Archies

After filming the video for filling the piping bags it was time for a break; I could not concentrate, it was getting loud and crazy inside and frustration was setting in. So we went outside played a little basketball, jumped on the trampoline, played with chalk, and dig a little digging.


Practicing Piping Skills

So I found this TikTok video about practicing piping skills without needing to make a cake and thought that was genius! I have a lot going on this weekend so this was handy. Take a look at both our videos:

@carolacakesdecorator

#satisfyingvideo with #pipingbag #perte #fy #impararecontiktok #cake #pipingskills #cakedesign #pipingtips #torta #tutorial #tutorialcake

♬ In The End – Mellen Gi Remix – Tommee Profitt & Fleurie & Mellen Gi

My attempts:

Now this is a skill all in itself! I clearly am going to need much more practice so I decided that the icing I made today I will put into the fridge and this week if I get an extra moment I will take it out and practice again and again. I may also need to look into piping techniques from other sources. Cake by Courtney has another cake decorating class a more “advanced” one then what I just took and it offers exactly this but it is another $150 USD and I am going to hold off on that for now.

@christinebruce01

Major learning project: Practicing piping

♬ Dancing In The Moonlight – 苏颜悦

Social Media & Activism Can They Hold Hands?

I am left with more questions than answers when it comes to effectiveness and then I also feel very anxious regarding sharing of radical activism.

I think it’s fair to say that social media can take any issue and ignite it in positive and/or negative way

https://verdemagazine.com/the-rise-of-social-media-activism-student-voices-reach-global-platforms

s. Platform such as Twitter, TikTok, Instagram, Facebook have the ability to share information very quickly across the globe to generate awareness but I still question if reposting/retweeting without reading or understanding what the issue is, isn’t doing as much justice as intended. I also am left questioning myself prior to reposting is, is this information correct or is it filled with misinformation; am I getting the right information to share?

Some other issues I see is how is the intention of the post being changed to fit a different narrative? Prime example was given in class with the ALS ice bucket challenge and how the narrative changed so quickly and the actual cause was diluted.

I read a few articles this week to help me understand how social media activism could be seen as a good thing:

Social Media Activism in 2023: How to Go Beyond the Hashtag

I really liked that this article stated that “Social media activism must be accompanied by real world action.” which spoke to how I am feeling about this topic this week. To share a post may make a difference but it needs more; there has to be an action to follow along with it, otherwise I struggle to see the point beyond awareness.

This article also provided some authentic tips on how to use social media to support a cause:

  1. Pause and Review your social calendar- take a moment to decide if you can really commit to the cause you are engaging with
  2. Listen- emotions will be running high, using social listening to understand the audience will allow for more empathy & solidarity
  3. Be honest and transparent- before posting take a inward look at yourself to reflect of your history and your culture
  4. Be human- just be authentic
  5. Make your stance clear and consistent-
  6. Share how you are taking action- show what you are doing beyond sharing a post
  7. Plan for good and bad responses- not everyone will agree and with social activism you are trying to break a status quo
  8. Diversify and represent- Do not use social media activism as a way to just check off a box once. Your should represent it on a continuous basis
  9. Keep going- The work doesn’t stop after the hashtags stop being popular. Commit to long term goals.

A Guide to Activism in the Digital Age

This article showed how social media could promote social justice

  • Coordinating community responses
  • Platforming lived experiences
  • Promoting & planning events
  • Sharing pictures & videos
  • Signal boosting
  • Utilize the college population


This video shares both my reservations about social media activism and the great opportunities it can offer to causes:

  • Everyday people who care about an issue can get together and make change
  • Every post you make shows who you are and what you stand for
  • Social media has been at the forefront in many movements around the world
  • Social media has revolutionized activism
  • It is now cool to go to marches and then post pictures of it
  • Many people will tweet a hashtag, share a video, and then continue with their lives without actually engaging in real change but hashtags are not truly helping. If it doesn’t create awareness that leads to action off the internet then it is useless.

Sophie Eadgar suggestions for tying the 2 together:

  1.  identify an issue
  2.  inform yourself about it (look at both sides)
  3.  vote- see what politicians support the same issues
  4. set ambitious and realistic goals about what you really want to see
  5. volunteer your time- it is not a weekend plan it requires long term commitment

So now what does this mean for me and modeling for my students?

After class I decided I would take a dive into social media activism that is a topic near and dear to my heart and this happens to be based around social media itself and its effects on teens specifically teenage girls. So this week I have been primarily retweeting and researching the connection between the two. My daughter currently struggles with her mental health and she has shared with me on more then one occasion why can’t she look like girls that she sees on her social media apps; I have found her trying to pose, trying to dress, do her make up & hair, to match these unrealistic pictures and there is so, so, so much more; it is heartbreaking. Now if my daughter is going through something like this and it is already an issue, I can foresee it being something my students may struggle with and this is why I do believe policy change will be necessary.

Common Sense shared this article:

Teens and Mental Health: How Girls Really Feel About Social Media

and this is one of the fact sheets about TikTok howdogirlsreallyfeelabouttiktok_v2-_0

So at this point I will focus on the sharing & researching pieces of the activism on this particular topic to generate awareness. My hope is that one day there will be policy changes made to social media that is supportive of teens mental health and not detrimental.

Task:

I want to send you away with an intriguing task. I want you to research TikTok (which is made in China) and how it is different then in the U.S. & Canada. Then ask yourself why & share with me your thoughts . See this article below:

https://www.kcra.com/article/tiktok-chinese-company-why-doesnt-it-exist-in-china/43408158#:~:text=But%20the%20wildly%20popular%20platform,a%20sister%20app%20called%20Douyin.


Baking Substitutions

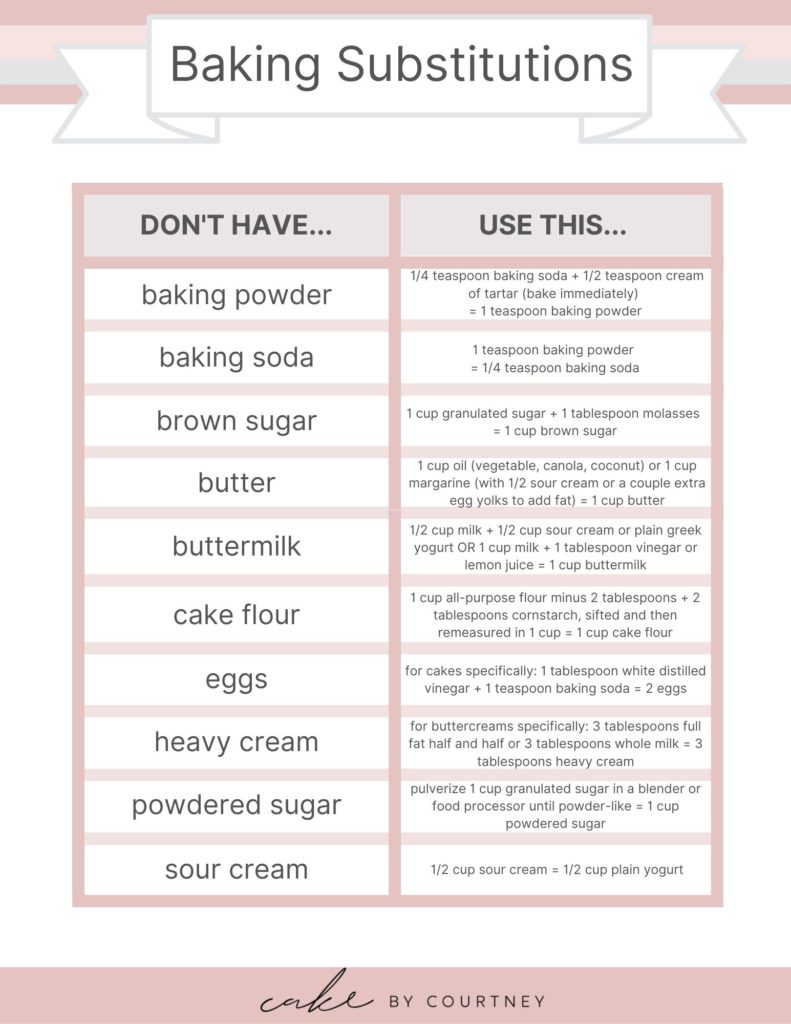
You know I have been there and I am sure other people have too. You are right in the middle of baking and you realize you are missing baking soda but you have baking powder this often happens to me. However through my cake decorating class I discovered you can make other baking substitutions with other items. See the picture below. If you are ever in a pinch you may just have everything you need so that you don’t have to make an emergency run to the store. Real Simple also has some great suggestions for other baking substitutions that I recommend checking out as well.


https://cakebycourtney.com/easy-baking-substitutions/

Twitter Friend or Foe?

To be honest it isn’t a friend or a foe I just don’t like to use it; so I guess you can say I am a reluctant user. I find myself forcing myself to use it and I see it as another social media app that just takes my time away from my life; something else that requires my attention and effort to keep up and maintain. I can appreciate the opportunities Twitter has to offer and the professional connections that could be made but at this point in my life I cannot give it the time I feel like it requires.

I did spend some time researching how Twitter could be used in the class for anyone who is interested I found this site:

How Can Twitter Be Used in the Classroom?

This academic article looks at using Twitter K-12: Using Twitter for education: Beneficial or simply a waste of time?   There are some great reasons as to why using Twitter in the classroom would be beneficial but do the cons outway the benefits? I will let you make your own decision.

I found this academic article using Twitter across educational settings but I felt it was more geared towards University levels  International Journal of Educational Technology of Higher Education 


If I knew You Were Coming I’d Baked a Cake

What a week this was!!! I went to visit my husband in Calgary who was away for some locomotive engineer training and we celebrated our 8th wedding anniversary up in the Calgary Tower Sky360 restaurant (I give it 5 stars for sure) , took in the zoo and spent some time in the mountains, it was such a great and relaxing weekend away. When I got home adulting hit me hard, the very next morning our basement flooded from a burst outdoor water tap, then I found a hairline fracture in one of our toilets, one and one of the fridge door compartments cracked…. jeez… you leave for 4 days and the house just decides that was enough… anyways I am back at it and welcome to this weeks major learning post.


This week I made the same Banana Cake with Cream Cheese Buttercream as I did the last time. I chose to do this simply for familiarity purposes so I could put more of my time and effort into working on straighter finishes and edges. Something else I did was I made my cakes Friday night and then decorated them on Saturday evening; this made it feel like a less daunting and time consuming task. This blog post at the beginning is primarily “research” I did this week and links/videos of it. At the end you will enjoy my very own TikTok videos of my work (trust me you do not want to miss one of the videos where I am singing at the end because I could not get the song to go longer).

Besides following along with the online cake decorating class I am doing, I also looked up a few other tutorials found here:

Listened to a few podcasts:

Watched a few other tutorials:

From other bakers on how they achieve cleaner lines, I used TikTok & Youtube (I appreciated some connections that I made between the class I am taking and the Youtube tutorials):

@colhouncreations

Stack a cake #cake #fyp #howto #beginnersbaking #cakedecorating

♬ original sound – Laura Colhoun | Baker

@theblondewhobakes

How to get a smooth and clean look with your buttercream frosting. 🍰 Turn up the volume and save for the next time your making a cake 🍰 ___________________________________ #theblondewhobakes #cakedecorating #cake #cakes #food #foodie #baking #foodlover #frosting #cakesofinstagram #cakeoftheday #cakevideo #learnontiktok #tiktokpartner #foodtiktok

♬ Sky Aesthetic – Tollan Kim

Now here comes my videos of this week! (Don’t miss out on turning your sound on)

Layering:
@christinebruce01

♬ Cake – Flo Rida,99 Percent

Crumb Coat:
@christinebruce01

♬ Cake By The Ocean – DNCE

Final Layer:
@christinebruce01

♬ If I Knew You Were Coming I’dve Baked a Cake – Gracie Fields


Final Product:
@christinebruce01

♬ Birthday Cake (Dance Remix) – The Re-Mix Heroes


Go Shorty It’s Your Birthday! We Gonna Make Cake Cause It’s My Birthday

Welcome to my party! What is more perfect to practice the skills I have been learning about then to make my very own birthday cake? Now the lessons I am following called for a funfetti cake I chose to use one of Cakes by Courtneys other cake recipes a Banana Cake with Cream Cheese Buttercream Frosting ,and yes it was as delicious as you think it would be; seriously you need to try this. YUMMMMMMY! Here was my focus for my first cake because I learned that it is not just about decorating the cake as much as it is also about creating the cake. So today I focused on:

  • What I need to know before starting
  • How to bake the best tasting and looking cake (creating a cake from scratch)
  • Making the best tasting buttercream
  • How to stack and crumb coat
  • Using some of the tools and creating straight and smooth edges

I didn’t get into anything fancy decorating wise today, I wanted to focus on what I thought was just basics but man did those “basics” really take time and some serious learning for me! Straight and smooth edges are no joke; it was hard!

Before Starting

This goes for any cake you are making:

  • Turn your oven onto the required temperature 30 minutes before starting. You want the oven to reach its full potential before you put the cake in. If you put your cake layers in 5 minutes after it says it is done heating up they will not bake evenly, you really want it at full heat.
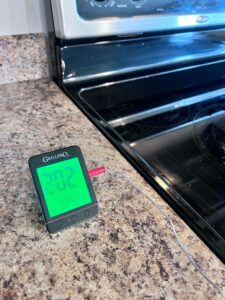
  • DO NOT use convection bake; it usually runs hot, and then makes your cake dry
  • Use an oven thermometer to see if the internal temperature is actually matching what the oven is telling you. Even if it is a few degrees off it can change the way your cake bakes. Get to know your oven
  • Now this is another big one, get all your wet ingredients out of your fridge at least an hour before you begin baking. You want those ingredients at room temperature and the reason being is that they will be better absorbed by the dry ingredients. It helps your cake rise more evenly
  • .
  • Do not over mix your batter, mix it at a very low speed
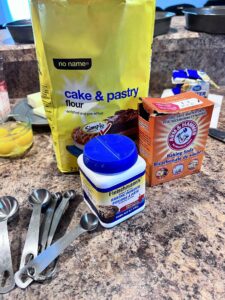
  • Use fresh baking soda and baking powder nothing over 6 months old (key)
  • Use cake flour if you can. It is a finer flour and will make a fluffier and lighter cake. Highly preferred


Getting The Best Tasting & Looking Cake

To get started Cakes by Courtney recommends that when making a cake recipe for the first time that you follow it exactly as the author intended for you to. Once you have done it, after that, that it when you can make your substitutions to it. I am a slight rebel but also a rule follower at heart so for this cake I kinda went slightly off the beaten path and instead of making this Banana cake a single layer cake I made it into a 3 layer cake. (oooooooooo such a daredevil I was), doing so didn’t require me changing anything to the cake recipe but it did mean I had to double the buttercream but we shall talk about that later.

  • begin with room temperature butter, add sugar and vegetable oil
  • mix this at a medium speed but after this everything will be mixed a low speed
  • scrape down the sides to make sure it is all blending really well, do this after you add the eggs in as well
  •  For vanilla you can use whatever kind of vanilla you want, it’s all okay
  • Now a very interesting step here was alternating my cake flour mixture and buttermilk (I have never used buttermilk in cakes before so that was something new), starting with your cake mixture and ending with your cake mixture. This helps the ingredients blend more evenly. 1/3 flour, 1/2 buttermilk, 1/3 flour, 1/2 buttermilk, finish with 1/3 flour.

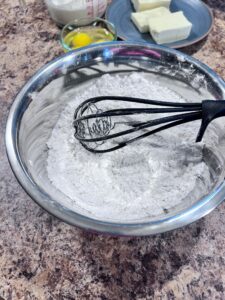
    blending the cake flour, sugar, baking powder and soda

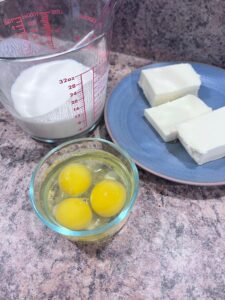
You can create your own substitute for buttermilk by using 1/2 part greek yogurt, 1/2 part whatever milk you have

  •  Continue to scrape down the sides of the bowl.
  • If you ever want to colour your cake batter you want to fold the colour in, never use your mixer. Because you do not want to ever over mix. Use a spatula

You wanna know why I love this baker? Especially at this step?  She says you always have to sample. Bon Appetit, says the biggest mistake a baker can make is not taste testing along the way. She said to lick the bowl clean! OK twist my rubber arm!!! I may have had a taste or two but my kids cleaned it right up.


Creating the Perfect Layers

All her recipes are good for 3- 8″ cakes or 4- 6″ cakes. At this step I then decided that I should be okay to make a 3 layer cake just like I wanted too. To ensure the cake batter is evenly shared you need to use a scale. She uses around 16 oz  of batter per cake pan. I found that had more cake batter with this recipe so I just adjusted accordingly.
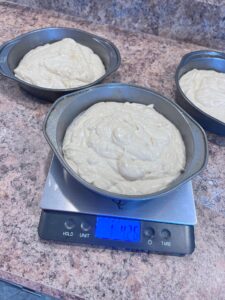
This helps the cakes bakes even more evenly, when they come out of the oven they will look more even.

Preparing the pans

In my previous cake making I only ever sprayed the pans. Today I used some tricks I learned in the class.

  • Spray the pan including the sides
  • Use parchment paper on the bottom ( I traced the bottom of the pan as you can so slightly see if you really look hard in my picture and then cut it out)

  • Then you spray the parchment paper again in the cake pan
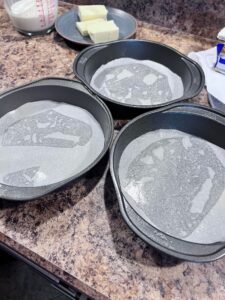
  • Once the cake is in the pans use a spatula to spread it out as evenly as you can

Baking the Cake

  • It is crucial that once you get closer to the baking time being up that you turn on your oven light and pay really close attention to your cakes
  • You will know they are baked perfectly when the top is slightly golden brown and it is not shiny anymore. The sides of the cake are barely pulling away from the sides of the pan.
  • The most important part though is you need to put a toothpick in the center of the cake and when you pull it out you are looking for a few moist crumbs on the toothpick

Something I can’t believe I never put 2 and 2 together is just like meat when you take it out of the oven/grill it is still cooking. Of course DUH that means cakes would do the same… it is still baking for about 5 additional minutes afterwards. Surprise!!
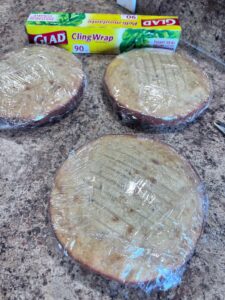
Once the cakes were done cooking I let them cool down for about 15 minutes and then wrapped them up and stuck them in the freezer. Putting cakes in the freezer for at least an hour is a very important step for when you are ready to do the crumb coat.

Making the Buttercream

Everything about about having room temperature ingredients like when you make a cake throw it out the window (her first words in this section) it made me giggle like oooooh kay. You want to have slightly cold ingredients this time. The butter can come out of the fridge about 30 minutes before you begin. This will help get a good consistency in the buttercream. If your frosting ever just falls off the spatual it is because the butter was not cold enough it was too soft and sitting out too long.

Now this is where things got interesting was with her second tip...

Sift your icing sugar… it will help make the icing sugar lighter and fluffier which will help give you a smoother buttercream DO NOT skip this step she said, you will not be disappointed she said… use a big mesh strainer. Well I don’t have a sifter… so I chose to use just my regular strainer like you use for pasta… what a mess!! I do not recommend using a pasta strainer at all, I am sure the metal mesh strainer is sooo much better than this. Now remember earlier I said I doubled my buttercream recipe so that meant 12 cups of icing sugar…

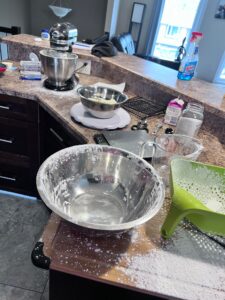
It got my floor, all over my counter, it was just a mess…. I gave up… then my husband walked in and ask what in the world I was doing, so I explained. He said “you know if you use a whisk you can also get the same results a similar one”…. Go away Gord, I never asked you…. UHHHHH.

Another tip I learned is to measure my icing sugar first and then sift which I did.

So now I am at the point where I can add my buttercream ingredients together so off I went following the video and the recipe. My second mistake in the buttercream was trying to double it all at once. What I should have done was make single batches and then combine them after. My mixing bowl in my Kitchen Aid was not even close to being big enough but I tried anyways…. OH MY! Yep this is exactly what happened even mixing on low speed…

So at this point I paused and took a deep breath in. Split what I could in half and tried again in smaller batches then combined them afterwards. Even with these hiccups I will call them, the buttercream still tasted AMAZING! It was light and fluffy.

Stacking & Crumb Coating The Cake

Now that my cake has sat in the freezer for a hour it is ready to begin staking and applying the crumb coat.

  • On the cake board apply a small amount of buttercream in the middle. This helps keep the cake in place and not slide around on the board
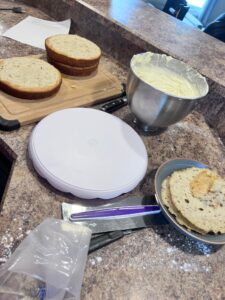
  • The first 2 layers put top side up
  • Using 3/4 cup of frosting and the off set spatula, put the frosting in the middle of the first layer and spread it around. Using the turn table move the frosting to the sides coming towards you. Try to keep it really level with the cake. This is an prime opportunity to level out the cake without having the cut away too much. Get eye level with the cake “get into a cake squat”.
  • Put the next layer on and do your best to get it centered and repeat.
  • Pipe a rim of frosting around the edge if you need that support
  • Use a light touch always! If it is too hard to spread around, put it into the mixer and whip it up some more
  • For the last layer, put it top side down, it has the least amount of crumbs on it and also should have a nice smooth top.

Crumb Coat Time

  • Using a crumb coat is key in locking in those crumbs so they do not appear in your final buttercream frosting.
  • Apply a thin layer of frosting. Let it then sit in the freezer for about 15 minutes. This does not need to be pretty.
  • Start on the sides of the cake
  • Use the straight spatula
  • Turn the cake away from you
  • Bring the spatula towards you
  • Go towards the bottom but do not go over the cake board
  • Add a little bit to the top, use the offset spactual on the top.
  • Now using the cake scraper, starting at 1:00, left  hand does all the turning, the right hand holds the cake scraper at a 45 degree angle, and lightly go around it. Only go from 1:00 to 4:00 then go back to 1:00. If you are left handed it’s 11:00 to 7:00. This is to only get 1 scraper line
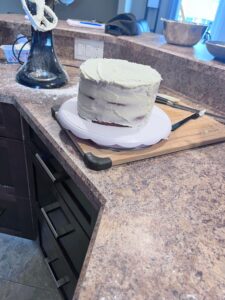
    • Crumb Coat Completed

    Final Stages of This Birthday Cake

    Mastering the art of straight sides and edges is not joke. I need much, much, much, more practice with this!

  • The top of the cake comes last, start with the sides
  • If the crumb coat ever becomes not cold, put it back in the freezer
  • Spend a couple minutes with a wooden spoon whipping the buttercream up, it helps get all the air bubbles out of the frosting and make it silky smooth.
  • Use the straight icing spatula go around the cake focusing on the top first
  • Begin working your way down your board once the top is done.
  • Wave back and forth as you apply the remaining icing, using the turn table and apply the icing towards you
  • Don’t frost in front of you, it is just awkward
  • Now using the cake scraper
  • Keep your eye on the scraper
  • Use 1/4″ of the scraper. use a 45 degree angle the whole time this will smooth everything out
  • Use a light touch
  • Start at 1:00 and turn the table all the way around
  • Do some spakelling if you need to, to help fill in the holes. Do not add a ton of frosting.
  • Always clean off your scraper
  • Do not over work the buttercream. Get it applied within 15-20 minutes. This is done for a couple reasons: the crumb coat will thaw, and for your sanity
    1. This was huge! Oh man was I getting frustrated it just wasn’t perfect. I need to work on the 45 degree angle part…
    2. There will never be a cake the is perfect all the way around.
    3. Tears are not worth it, cake = happiness.
    4. Each time I make a cake I will get better and better
  • Put the cake back in the freezer in about 15 minutes

TaDa! Here is my first finished cake
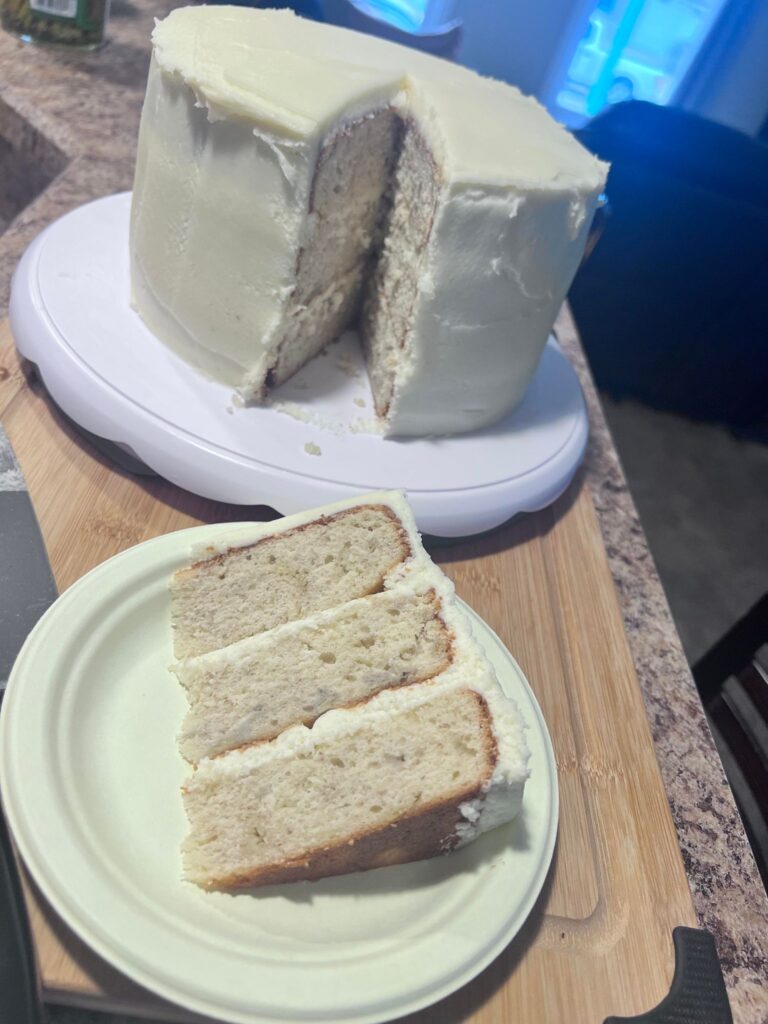


It’s Me, Hi, I am the new Social Media Tool, It’s Me

Last class there were many new extensions and tools that were shown to us and I shared those in my
twitter post part 1 and twitter post part 2. During class I never really gave bit.ly and onetab much consideration given that I am not a person to have many tabs open and I thought bit.ly was maybe to “high tech” for my grade 4 students, that I would not need to ever share a link with them that they couldn’t easy put into google…. BUT…. here is the thing…. we are beginning to learn how to write informational reports and for this go around I am holding their hands through the process. I thought what an absolute perfect opportunity for me to share websites with them that are “teacher approved” and “kid friendly” by using the extension OneTab and then using bit.ly to shorten the URL link so the students have access to these great websites I found; super easy and quite painless right? Yep it sure was! I think my first thoughts about the extension and the tool were totally wrong; this made my job easier today, it made the students researching easier, I felt like it was more controlled, and the students didn’t have nearly as many questions.

I would highly recommend using OneTab for this purpose, it may not be what it was intended for but wow did it make a difference and bit.ly made it so easy for students to put in a URL that wasn’t too complicated for them.