Has technology made society more equitable?
Has technology made society more equitable? I don’t think so. This is one debate where I knew it would take a lot to sway my vote.
 Are there aspects of technology that help create a more equitable society? Absolutely. But this doesn’t mean that technology has created an equitable society. Unfortunately, inequity is everywhere even with the power of technology.
As noted by the agreeing team, there are several ways that technology has made society more equitable. But what does equitable use of technology even mean? As presented by Suzanne K. Damarin, “Equitable use of educational technology requires that instructors recognize and adapt their technologically-enhanced instruction to a wide variety of students and to an equally wide range of computing facilities accessed by students”. This approach ensures that all students, regardless of their socioeconomic background, have access to the same quality of education, thereby making technology a tool for levelling the playing field in education. Damarin also notes that there are five equity principles of educational technology:
- Parsimony: Use the least costly tool that will accomplish the task.
- Accessibility: Use the most accessible technology that will accomplish the task.
- Multiplicity: Make computer-based materials available in multiple formats.
- Separability: Make parts of documents and files easily separable.
- Full Utility: Teach students to make maximal use of any tool available.
By adhering to these principles, educational technology can be designed and implemented in a way that ensures all students have equitable access to the tools and resources they need to succeed. But, this is where the digital divide comes in. The reality is that not all students have access to technology.
The documentary film, “Without a Net“, highlights economically disadvantaged schools that struggle with technology access, which leaves their students unprepared for the digital economy. Despite technology’s potential to level the playing field, the documentary shows that many schools face major challenges like poor connectivity, lack of devices, and insufficient teacher training. The film emphasizes that real progress requires reliable internet, updated devices, better teacher support, and strong leadership. Until these issues are addressed, technology may widen the gap rather than close it.
I think that does it. Technology hasn’t led to a more equitable society. IF you have access to technology you can create a more equitable classroom environment, but at the end of the day, that’s IF you have access. And the statistics don’t lie.
One thing that stood out to me during this debate was the idea that technology, and social media platforms, are essentially a form of modern colonization. I never even considered this and find it to be an interesting concept. I looked a bit more into this and I was surprised to find it isn’t a new idea. The Centre for International Governance Innovation explores this concept further:
With that being said, I think the answer is simple – technology has not created a more equitable society. Maybe it has even made it more inequitable.
Technology has led to a more equitable society: All students (including the debaters) should read the articles chosen by the two debate teams (listed below) and should also refer to the articles embedded in the debate description (above, under today’s activities – no need to read them all, but take a general overview) and compose a blog post reflecting on the articles as well as the debate itself.
Cell Phones in the Classroom – Good or Bad?
Should cell phones be banned in the classroom? No, they shouldn’t.
During this week’s debate, several concerns were raised regarding student cell phone use in the classroom including:
- Cell phones distract students from learning and reduce productivity. According to KSL News: Too many texts: Cellphone experiment shows impact on learning, it takes students almost 20 minutes to refocus after looking at their phone.
- Persistent cell phone use results in poor academic performance.
- Cell phones allow students to record and share negative situations that occur in class.
I will admit I was surprised to learn that “A 2023 study by nonprofit Common Sense Media found that students receive a median of 237 phone notifications a day, a quarter of them during school”. I mean that’s a scary thought and 237 phone notifications a day is without a doubt distracting.

So you know what? I’m not even going to argue against these points. Yes, cell phones are a distraction. Yes, cell phones can impede a student’s learning. But when I look back on my own educational experience, I can find just as many distractions. My Tamagotchi and the constant note-passing have to be somewhat equivalent to cell phone use today, right? And I know someone thinks it isn’t, but I’ll end my point with this: One time in grade 5, my friend got caught passing me a note and she had her desk searched. The teacher found, and I’m not kidding, 100s of crunched-up pieces of paper. I had 2 Ziploc bags full of notes that I had to take home to my parents that night. Students will always be distracted with or without a cell phone.
I feel like I should add here that I do take my students’ phones away, but I take them away when necessary based on my professional judgment. If I am lecturing and students are taking notes? No phones! Phones during an exam? No way! But guess what? Almost every single time, my students find a way to distract themselves.
I was surprised by the question of teacher cell phone use. It has never crossed my mind that teachers should also have their cell phones banned in the classroom. I will be honest I think that this is comparing apples to oranges. At the end of the day, I am an adult and a professional and I should be treated as such. Do I go on my phone during class time? Yes, I do. Am I only going on it for work-related reasons? No, I’m not. Do I leave work every day having done my job to the best of my abilities? Yes, I do. In my seven years of teaching, there have been several situations where my cell phone has saved me. I won’t bore you with them all, but trust me taking my phone away is 100 percent, in my opinion, risking the safety of myself, my students, and my school.
I can’t wear jeans because I’m a professional, but can’t be trusted with a cell phone? What a paradox!
As noted during this week’s debate, there are several positives to cell phone use in the classroom:
- Cell phones provide an additional tool for learning. This is beneficial for students when they don’t have access to technology in their everyday classroom.
- Cell phones improve communication with teachers. This allows students to ask questions and receive feedback when needed.
- Cell phones help students stay organized.
- Cell phones can allow teachers to explore a wider variety of resources that are available digitally but not physically due to budget constraints.
In my classroom, students use their phones frequently. As I have noted in previous posts, I am a Connected Educator so my students have access to 1:1 technology. This has been a blessing, but it isn’t perfect. It is much easier to get students to use their cell phones to do a Kahoot! at the start of class before we take notes on paper (no laptop required). Similarly, there have been several occasions where students have had to complete work on their phones. Everything I do is digital, but there are times when a student’s laptop won’t work and IT can’t get there right away to fix it. I’m certainly not going to tell the kid to do nothing for an hour so their cell phone is the only way for them to complete work.
For me, the benefits of cell phones outweigh the risks or at least for the time being.
Cell phones should be banned in the classroom: All students (including the debaters) should read the articles chosen by the two debate teams (listed below) and should also refer to the articles embedded in the debate description (above, under today’s activities – no need to read them all, but take a general overview) and compose a blog post reflecting on the articles as well as the debate itself.
Is AI the Future?
I will come right out and say it – I LOVE AI. I have strongly advocated for AI in education since the first day Chat GTP was introduced to the world. So… this made this week’s debate REALLY hard for me. Despite my feelings, I pushed forward and dare I say I am slightly more suspicious of AI now.

AI is here, and it is here to stay. And because of this, I never once stopped to consider the negative aspects associated with it. Admittedly I didn’t think there could be any. Who would ever argue against something that is going to make life easier (see what I did there?). So I was surprised when I found article after article exploring the darker side of AI technology.
One reoccurring concern was the dehumanization of education. Education, of course, is about learning. However, at a much deeper level, education is about connection. A teacher’s job goes far beyond a whiteboard. Student-teacher relationships are the foundation of the education system. A robot, or in this case GenerativeAI, cannot help this. As noted by ClassPoint, “With AI algorithms generating content and deciding the pacing of the lessons, students may miss out on the nuanced approach that a human teacher can offer. Additionally, AI algorithms can perpetuate bias, meaning that they may fail to provide an inclusive and diverse curriculum that is tailored to the needs of every student”.
It was noted during the debate that GenreativeAI systems like Chat GTP can be used to provide instant feedback. And while it can, I don’t think it should and this comes from personal experience. During the previous school year, I tried to use AI to generate comments for a lengthy summer reading assignment that my advanced English Language Arts 20 class had to complete. At first, I was sold, my marking time was practically cut in half. I handed back the assignments and went off into quiet teacher bliss. Or so I thought. It didn’t take long for students to start asking for better comments or specifics on what they did wrong. And then before I could even catch my breath – “Mazur you used AI didn’t you?”. I had been caught. This situation taught me one thing – Chat GTP made my job much easier in the moment, but it didn’t replace the “human touch”. After much reflection, I decided it would have been easier, and much less stressful, to have written personalized comments for all 67 of my students. But maybe I am using the wrong application here! Someone enlighten me, please! I am begging you.
One thing that surprised me the most during my research was the inaccuracy of AI information. I always thought AI knew it all including current events. This isn’t even remotely true. Chat GTP and other similar GenerativeAI systems have a “knowledge cutoff” date. The argument could be made that other educational resources like textbooks have similar cutoff dates. However, I would argue that we are aware that a textbook published in 2019 wouldn’t contain information about the 2020 COVID-19 Pandemic. But, myself included, would have assumed that GenerativeAI systems like Chat GTP would be up to date with current information. Something to consider nevertheless.
But alas, am I convinced AI is ruining education? No, I’m not. Maybe I’m not supposed to admit that since I was on the disagreeing side? Several positive aspects of AI were noted during this week’s debate. First and foremost, of course, is the fact that AI is making our job easier. AI revolutionizes the way we plan, assess, and communicate. According to the World Economic Forum, AI can:
- support education by automating administrative tasks, freeing teachers to focus more on teaching and personalized interactions with students, enhancing rather than replacing human-led teaching.
- improve digital literacy, critical thinking, problem-solving and creativity, preparing learners for future job demands.
- tailor the learning experience to the individual, enhancing academic performance while seamlessly catering to diverse learning needs.
It was also noted that AI technologies can be used to support students of varying needs. And who wouldn’t want this? But I would be cautious to say that AI helps educators support ALL students better. It would be remiss to not acknowledge the digital divide that exists globally.
As I mentioned earlier, I kind of like AI. Okay, I love AI. I use it for everything from rubric-making to reference letter writing. I have seen firsthand all the ways AI has made my job easier. I also use AI to help support my students better by using the following applications:
- Grammarly: Grammarly is the AI writing partner that helps people at every stage of the writing process, from blank page to final draft.
- HelloHistory: Engage students with interactive AI-driven dialogues and role-play activities that offer first-person perspectives and debates on historical events
- Parlay: Parlay is an AI-powered instructional platform that helps teachers facilitate meaningful, measurable, and inclusive class discussions.
Looking back on this process, I am surprised to find that my perspective has changed. Will I stop using AI? No, I won’t. But will I be more aware of the gambit of issues that this type of technology will present? 100 percent I will. New ammo for that first staff meeting back in August! So, yes I will keep using AI for now and I’ll hope and pray that one day I am not fired in favour of the newest model of AI robot.
Is social media ruining childhood?
Is social media ruining childhood? I don’t think I have a definitive stance. But if you held a gun to my head and said I had to choose I think I would say it isn’t ruining childhood.
As I reflected on this week’s debate, I found myself coming back to one thing – what are we defining as “childhood”? Britannica defines childhood as a “period of the human lifespan between infancy and adolescence, extending from ages 1–2 to 12–13”. If we go by this definition, we would be arguing that children from about ages 2 to 12 are negatively impacted by social media. If this is what we are arguing, I don’t think I agree. However, when we start talking about 11 to 18 years I do believe the conversation begins to shift. Maybe I am just getting caught up in semantics here.
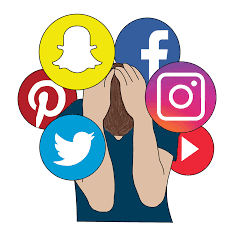
Are there negative impacts of social media use? Absolutely. I think this is an undeniable fact. Studies have shown that teenagers are negatively impacted by social media in several ways. For example, the Childhood Mind Insitute notes several including:
- Social media is an indirect form of communication so children are not developing social skills.
- Social media increases the risk of cyberbullying and imposter syndrome.
Studies have also shown that social media is shortening children’s attention spans. According to Queens University Journal, “Young people used to eat up books, but now, the amount of children who read for fun has declined from 35 percent to a meagre 17 percent. The reason for this is simple and unsurprising: social media and our increased electronic device usage”.
While these are all convincing arguments, I don’t think I am entirely swayed to believe that this is ruining childhood. I look back on my childhood and can pinpoint several instances where these negative consequences have played out in my own experiences without social media.

For example, the days of standing in the checkout line at Walmart and looking at the magazine are not lost on me. Reading headlines like “Is <insert name here>” pregnant?” or “How did <intest name here> lose 15 pounds in two weeks” negatively impacted my perception of myself far more than any Instagram post ever did. I might be comparing apples to oranges here, but I guess my point is that childhood is a minefield of negative influence with or without social media.
And as pointed out during this week’s debate, there are positive aspects to social media use. According to the American Academy of Pediatrics,
- Social media allows children to stay connected with family and friends.
- Social media enhances learning opportunities.
- Social media allows children to access information that they may be embarrassed to ask a parent for (i.e., health concerns related to puberty).
At the end of the day, social media is here to stay. This means that, whether we like it or not, it will inevitably become a part of our children’s everyday lives.
[…] many of the same principles that guide healthy development and inform effective parenting will apply when supporting youth in their online activities and experiences. If this is true, then the good news for parents and policy makers is that existing evidence-based interventions and strategies may look different but will still be effective in supporting youth in the digital age.
– Candice L. Odgers and Michaeline R. Jensen
I am not going to deny that there are negative aspects to children having early access to social media, but I don’t think keeping it out of their hands entirely is an effective solution either. I think in this situation working with social media rather than against it will yield better results.
Social media is ruining childhood: All students (including the debaters) should read the articles chosen by the two debate teams (listed below) and should also refer to the articles embedded in the debate description (above, under today’s activities – no need to read them all, but take a general overview) and compose a blog post reflecting on the articles as well as the debate itself.
Does technology enhance learning? YES!
Does technology enhance learning? Yes, it does! 
I have to admit that I am a bit biased regarding this topic as I am a Connected Educator, so it would be a bit hypocritical of me to disagree. I have seen firsthand the positive impact technology can have on students in the classroom. Having 1:1 access has allowed me to make my lessons and assignments more engaging and inclusive. Gone are the days of boring History lectures, but rather my students can take a virtual tour of the Place of Versailles during our unit on the French Revolution or they can talk “directly” with a historical figure using HelloHistory. Beyond engagement, having access to 1:1 devices has helped me meet my students where they are at. The use of text-to-speech or even Microsoft Teams has allowed me to better support all of my students. So, from my firsthand experience technology DOES enhance student learning.
Going into the debate this week was tough for me because I knew I already had a pretty solid stance on this topic (see above). But I did find myself stopping throughout and thinking “Hmm! I never thought of it like that before”.
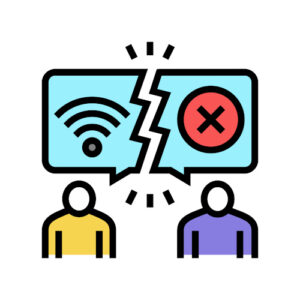
One main point of contention during the debate revolved around the idea of unequal access to technology. I think we would be remiss as educators if we didn’t come out and acknowledge this as fact from the start. Yes, we live in a connected world, but that doesn’t mean everyone can stay connected. According to Statistics Canada, almost 9 out of 10 Canadians have internet access at home. While this number seems high, it only accounts for roughly 94% of Canada’s total population. Another factor to consider when discussing this number in relation to student access is the number of children in a home. For example, a family with three school-aged children may only have regular access to one device whereas another family of a similar makeup may have access to several devices. The children in the first home are now at a greater disadvantage than the students in the second home. So while the number of Canadians with internet access seems high, there are several factors to consider when looking at it in the context of education.
Several academic studies highlight the digital divide that is being created as we grow more and more reliance on technology in our classrooms. But what is the solution? I don’t think there is an easy one. Bridging the digital divide will require lawmakers, educators, parents, and all stakeholders to play a role in creating a more equitable digital world.
I fully intend to keep using technology in my classroom to enhance student learning, but from this debate, I have quickly realized that it may not be all it is cracked up to be. As I discussed, the digital divide is always something to be cognizant of, but there is so much more (i.e., can students multitask, when does technology become a distraction rather than a tool, etc.). As one of the debaters said, technology should be used to SUPPORT learning, not enhance it – I myself need to remember this.
Technology in the classroom enhances learning: All students (including the debaters) should read the articles chosen by the two debate teams (listed below) and should also refer to the articles embedded in the debate description (above, under today’s activities – no need to read them all, but take a general overview) and compose a blog post reflecting on the articles as well as the debate itself.
A Day with Technology
Technology plays a significant role in every aspect of my daily life. I rely on technology from the moment I wake up until I go to bed.

My day begins with my phone. For most of us, our phones are what wakes us up in the morning. Ironic really. From that moment on, I am almost always using technology for something.
As I get ready in the morning, I listen to a podcast on Spotify, check the Weather Network, and answer any message I received while I was sleeping. Admittedly, there are a few TikTok breaks in there as well. My commute to work is only a few blocks, but during this time I am usually still listening to the podcast I started when I woke up.
My reliance on technology at work is no better. I am willing to admit that there is no way I could do my job without access to technology – my laptop is my teaching lifeline. Not only are my files (i.e., assignments, projects, PowerPoints, etc.) on my laptop, but my entire day book is digital. Since 2019, I have been using Planbook for my daily lesson plans. I have continually returned to Planbook every school year despite the small cost associated with the platform and always recommend it to my colleagues.

Beyond my daily lesson plans, I utilize many other forms of technology throughout my day it is almost dizzying. From the photocopiers to my classroom projector to Outlook for emails, I almost always use some form of technology to teach my students.
Most important, however, is my classroom laptop cart. The division I work for offers teachers the opportunity to become Connected Educator. I became a Connected Educator in 2023 and it has been a game changer for my classroom. Having access to one-on-one devices for my students has, in my observations, helped my students excel in my classroom as students are more willing to participate and engage in course content and it has created more equitable learning opportunities. The increased success in my classroom connected to access to one-on-one devices relies heavily on the fact that I can access several educational tools more easily than the average teacher.
Below are several online resources that I have found increase student success:
Kahoot!: An old faithful. Kids love Kahoot!. Before I became a Connected Educator, I found myself using Kahoot! less and less for two reasons: it was hard for kids to use their phones (i.e., spotty Wifi, etc.) and I thought kids were over it. Once I became a Connected Educator and had access to one-on-one technology I decided to try it out again and I am happy that I did. Despite it being used all the time, kids love it.
Quizlet: I love using Quizlet to help students study for exams. Studying can be a challenging skill for adolescents (mostly I think we don’t teach them how to study) and Quizlet allows students a digital way to keep flashcards. Students have the option to make their own study sets or, if you are feeling extra nice, you can make a study set for students that can be shared out to the class. Quizlet also allows teachers to create printable quizzes using the study decks which can be helpful when in a pinch!
Flipgrid: I just recently started using Flipgrid in my classroom. I was hesitant at first to use it out of selfishness because as a learned I would have HATED filming myself for an assignment. However, in a passing conversation, a student mentioned using it in another class and that they loved it. This moment made me realize that just because I would have hated something doesn’t mean I will. I have only used Flipgrid a few times so far, but I plan to use in in the coming school year in my classroom in several different ways!
After work, my reliance on technology only heightens. At any given point in the evening, it is almost guaranteed that I am listening to a podcast – there’s a trend here – or chatting with friends over text message. However, the real issue comes later in the evening when I begin scrolling TikTok. I am certainly aware of the addiction I have to TikTok and sometimes I am embarrassed to admit it as an almost 30-year-old has better things to be doing, but it is a hurtful truth.
After hours of scrolling, I am off to bed to repeat the cycle over again. Sometimes I wonder what I would do if my access to technology were to be cut off.
A scary thought, am I right?
Describe your current “day in the life” related to technology, teaching, and learning. What tools do you use? How do you connect with others? Describe your interactions with others, including your students, if applicable.
A Day in the Life…
Technology plays a significant role in every aspect of my daily life. I rely on technology from the moment I wake up until I go to bed.
My day begins with my phone. For most of us, our phones are what wakes us up in the morning. Ironic really. From that moment on, I am almost always using technology for something.
As I get ready in the morning, I listen to a podcast on Spotify, check the Weather Network, and answer any message I received while I was sleeping. Admittedly, there are a few TikTok breaks in there as well. My commute to work is only a few blocks, but during this time I am usually still listening to the podcast I started when I woke up.
My reliance on technology at work is no better. I am willing to admit that there is no way I could do my job without access to technology – my laptop is my teaching lifeline. Not only are my files (i.e., assignments, projects, PowerPoints, etc.) on my laptop, but my entire day book is digital. Since 2019, I have been using Planbook for my daily lesson plans. I have continually returned to Planbook every school year despite the small cost associated with the platform and always recommend it to my colleagues.
Beyond my daily lesson plans, I utilize many other forms of technology throughout my day it is almost dizzying. From the photocopiers to my classroom projector to Outlook for emails, I almost always use some form of technology to teach my students.
Most important, however, is my classroom laptop cart. The division I work for offers teachers the opportunity to become Connected Educator. I became a Connected Educator in 2023 and it has been a game changer for my classroom. Having access to one-on-one devices for my students has, in my observations, helped my students excel in my classroom as students are more willing to participate and engage in course content and it has created more equitable learning opportunities. The increased success in my classroom connected to access to one-on-one devices relies heavily on the fact that I can access several educational tools more easily than the average teacher.
Below are several online resources that I have found increase student success:
Kahoot!: An old faithful. Kids love Kahoot!. Before I became a Connected Educator, I found myself using Kahoot! less and less for two reasons: it was hard for kids to use their phones (i.e., spotty Wifi, etc.) and I thought kids were over it. Once I became a Connected Educator and had access to one-on-one technology I decided to try it out again and I am happy that I did. Despite it being used all the time, kids love it.
Quizlet: I love using Quizlet to help students study for exams. Studying can be a challenging skill for adolescents (mostly I think we don’t teach them how to study) and Quizlet allows students a digital way to keep flashcards. Students have the option to make their own study sets or, if you are feeling extra nice, you can make a study set for students that can be shared out to the class. Quizlet also allows teachers to create printable quizzes using the study decks which can be helpful when in a pinch!
Flipgrid: I just recently started using Flipgrid in my classroom. I was hesitant at first to use it out of selfishness because as a learned I would have HATED filming myself for an assignment. However, in a passing conversation, a student mentioned using it in another class and that they loved it. This moment made me realize that just because I would have hated something doesn’t mean I will. I have only used Flipgrid a few times so far, but I plan to use in in the coming school year in my classroom in several different ways!
After work, my reliance on technology only heightens. At any given point in the evening, it is almost guaranteed that I am listening to a podcast – there’s a trend here – or chatting with friends over text message. However, the real issue comes later in the evening when I begin scrolling TikTok. I am certainly aware of the addiction I have to TikTok and sometimes I am embarrassed to admit it as an almost 30-year-old has better things to be doing, but it is a hurtful truth.
After hours of scrolling, I am off to bed to repeat the cycle over again. Sometimes I wonder what I would do if my access to technology were to be cut off.
A scary thought, am I right?
Describe your current “day in the life” related to technology, teaching, and learning. What tools do you use? How do you connect with others? Describe your interactions with others, including your students, if applicable.
Course WalkThrough!
Over the course of this semester, creating my course prototype was very enjoyable and I knew immediately what I had to do. Off to Google Classroom, I went! I wanted to create something that I could use going forward in the classroom in the fall, as I work with my 10 diverse students. My students all have intellectual disabilities and are part of a numeracy and literacy intervention, which is tailored to their needs, as they do not work at grade level. Therefore, I chose to create a numeracy prototype, that would be suitable to my learners.
I chose to create a blended course, around double-digit addition, as this is something my students tend to struggle with. My students require significant repetition and refreshing, so creating this course was no question. My students are very familiar with Google Classroom and find that it is easily accessible to their needs. Within the assignments posted, students have simplistic, straightforward directions, to ensure clarity to complete the tasks at hand. Further, creating videos on “how to” within the course, was suitable to ensure the content was providing an accessible and equitable learning environment. A blended classroom was fitting as rotations are provided daily, where students have independent, small group, partner and a teacher station. Providing learning through a blended classroom, creates valuable skills, learning experiences that are accessible and equitable and creates a learning community where the teacher and the student learn alongside each other.
Gathering all my materials, was very easy for me as my brain was flowing with ideas. Interactive videos, check. Games, check. Interactive Google Slides, check. Board games, check. Online game show games, check. Extra support for an educational assistant, check. Now, all I had to do was put it together into one course. It simply started with jot notes, to paragraphs to a full-blown unit plan that I created, and then chose to share what 2 of the lessons would look like. Without a doubt, I had a very good experience with creating a course prototype!
Feedback
Further, receiving feedback within the breakout room was minimal but I appreciated the positive, reassuring thoughts that I was on the right track with my course prototype. Comments I received included: methodical, clear, concise, well thought out, thorough, and easily accessible. My group members talked about how I could consider discussing how my prototype would be accessible to all and what that might look like. Therefore, I included that within my introduction in my course walk-through, stating what some supports my students have within the classroom. I enjoyed the process of sharing and receiving/giving feedback.
Overall Thoughts
I feel very proud and confident of my course prototype that I have created. I am excited to share with my students, as we create a community of learning and I am proud to be alongside them in the process. I cannot wait to share my upcoming journey with double-digit addition. Don’t go far, there will be more to come in September, once my students are “blended” into the classroom.
So without further due, grab some popcorn and your notes! Here is my course walkthrough to share with you all!

Summary of Learning!
Check out my summary of learning below, to hear all I learned this semester! I know I talk fast, but let's get real, I only had 7 minutes and I had a lot to say about this informative class.
https://www.youtube.com/watch?v=zwU_RhNN6usReferences:
Bates, A.W. (2019). Teaching in a Digital Age – Second Edition. Vancouver, B.C.: Tony Bates
Associates Ltd. Retrieved from https://pressbooks.bccampus.ca/teachinginadigitalagev2/
Irvine, V. (2020, October 26). The landscape of merging modalities. EDUCAUSE Review. https://er.educause.edu/articles/2020/10/the-landscape-of-merging-modalities
Major, C. H. (2023, March 23). 6 strategies for building community in online courses. The K. Patricia Cross Academy. https://kpcrossacademy.org/building-community-in-online-courses/
Ritzhaupt, A. D. (n.d.). ADDIE Explained: Introduction. An Open Educational Resource for the Educational Technology Community. https://www.oercommons.org/courses/addie-explained-an-open-educational-resource-for-the-educational-technology-community/view