Well, here is my summary of learning for our course this semester. I thoroughly enjoyed learning about social media and open education alongside my fellow classmates and Katia. I find these Edtech courses very important in education. Technology is changing and developing every day. I want to be an educator who is aware of these changes in order to better support the needs of learners now and in the future. I used one of my favourite educational tools, Canva to create my video. It is free for educators! I challenged myself to be on camera this time as it is still not something I feel very comfortable with. I want to be the educator who gives my students the ok to take risks in learning and not be afraid to try something new and step out of their comfort zone!
If someone had told me 2 months ago that I would be able to independently use a power saw, I would have thought no way and asked my husband to help me. Fast forward 2 months and I now feel confident using it on my own, especially for straight cuts. However, the process to creating my project is what I am most reflective of in this final post.
As someone who lives in rural Saskatchewan, I am forever grateful that the University of Regina has such a great selection of online classes for me to be able to complete my Masters of Education remotely from the community I live and work in. Online videos and open resources have made it possible for me to learn a new skill online. The videos and articles I read throughout my learning process guided me to gain knowledge of how to use tools, purchase materials, build my raised bed, and fill it with the appropriate soil and plants.
I often seek out information and learning online but have never tried to learn a new skill. Our topic of open education that was shared by guest speaker, Alan Levine really opened my eyes to how learning should be free and accessible to all. All of the information at my fingertips, allowed me to access free content to learn a new skill. However, I know this is because I have privileges that not all people in the world are able to access.
I found many benefits to online learning when completing my project and a few challenges. This chapter in the open access book “Student Success” by Mary Shier shares a great list of the pros and cons of online learning. Here is my reflection of how my learning online went over the course of this term. I prefer to think of them as Strengths and Challenges as I did not see any cons in learning a new skill online just some challenges to be aware of:
Strengths:
Flexibility of learning-I could spend time researching and building around my work and home schedule
Accessing information easily-I was able to access a vast amount of information to support my learning using articles, videos and blogs from professionals.
Choice and Interest-tailoring my interest and allowing me to pick what I wanted to learn about made this project highly engaging and increased my self-motivation to work on it.
Learning style-I am a visual learner so I appreciated the opportunity to watch videos and spend time working with my husband to complete my projects. I would have had a difficult time if I was only allowed to read articles about the skill I was trying to develop.
Cost Effective-being able to learn a new skill for free was something I have never pursued. There was no fee to join a class or access a webinar online which I appreciated.
Challenges:
Limited resources-Something I discovered throughout my project was that although I could access great information online regarding materials and the soil I needed, it was not readily available to me in my rural community. This did add up in costs from my initial plans
Self-Motivation-I really had to push through and commit to completing this project as a new Principal this Spring.
Knowledge does not equal Skill-I realized very quickly that although I could read all about how to build a raised garden bed and watch videos to learn new information about the skill I was trying to develop, this did not equal me being able to easily apply my learning ie. using a drill and being able to cut precise angles.
Revising my learning-I had to be prepared to revise my initial plans and ideas to make it fit better with my environment and personal needs.
As I reflected on my learning process to complete my learning project, all of these strengths and challenges could be easily part of a students’ learning. Learning doesn’t always need to occur within the four walls of the brick building structure known as a “school”. Students can learn in different environments based on their learning needs and interests. This process made me recognize that we would like students to develop new skills but we need to be aware that there will be challenges along the way. I think the most important piece I take from this whole process is that knowledge does not mean you will be skilled in an area. In order to develop a new skill, you need many opportunities to practice and apply the knew knowledge you have gained. Only then will you see the growth and development of learning. This is a critical takeaway that I will be reminded of when asking students to complete independent projects. They will need time to gather their knowledge but I must also make sure they have the opportunity to practice and and apply what they have learned.
In closing, I am grateful that I have tried something new and am developing a new skill. I feel more confident to tackle another project in the future (maybe next summer). I am pledging to no longer be just the board holder/helper but also an active participant in future household projects! My little garden bed is growing and developing just like my own skills this term. I leave you with a final look (and my first Tik Tok) of my raised garden bed project as I added mulch for extra moisture and some solar lights for a little aesthetic appeal.
This past week our class learning topic was centred around the pedagogy of open education. Our guest speaker, Alan Levine challenged us to find our own definition of open education. So of course, I took to google to begin my research. Year of Open compiled a great list of definitions around what open education is from a variety of sources. After combing through the definitions, there were a variety of terms and words that stood out to me in regards to what open education means.
I believe that open education works for the common good. I see open education as a way to remove barriers around education and make learning accessible to all, giving opportunities to someone that may not have had access to technology or information before. As a person of privilege, it is my responsibility to help build opportunities to those that may not have access to learning. Being equitable in giving opportunities around education is what open educational resources allow.
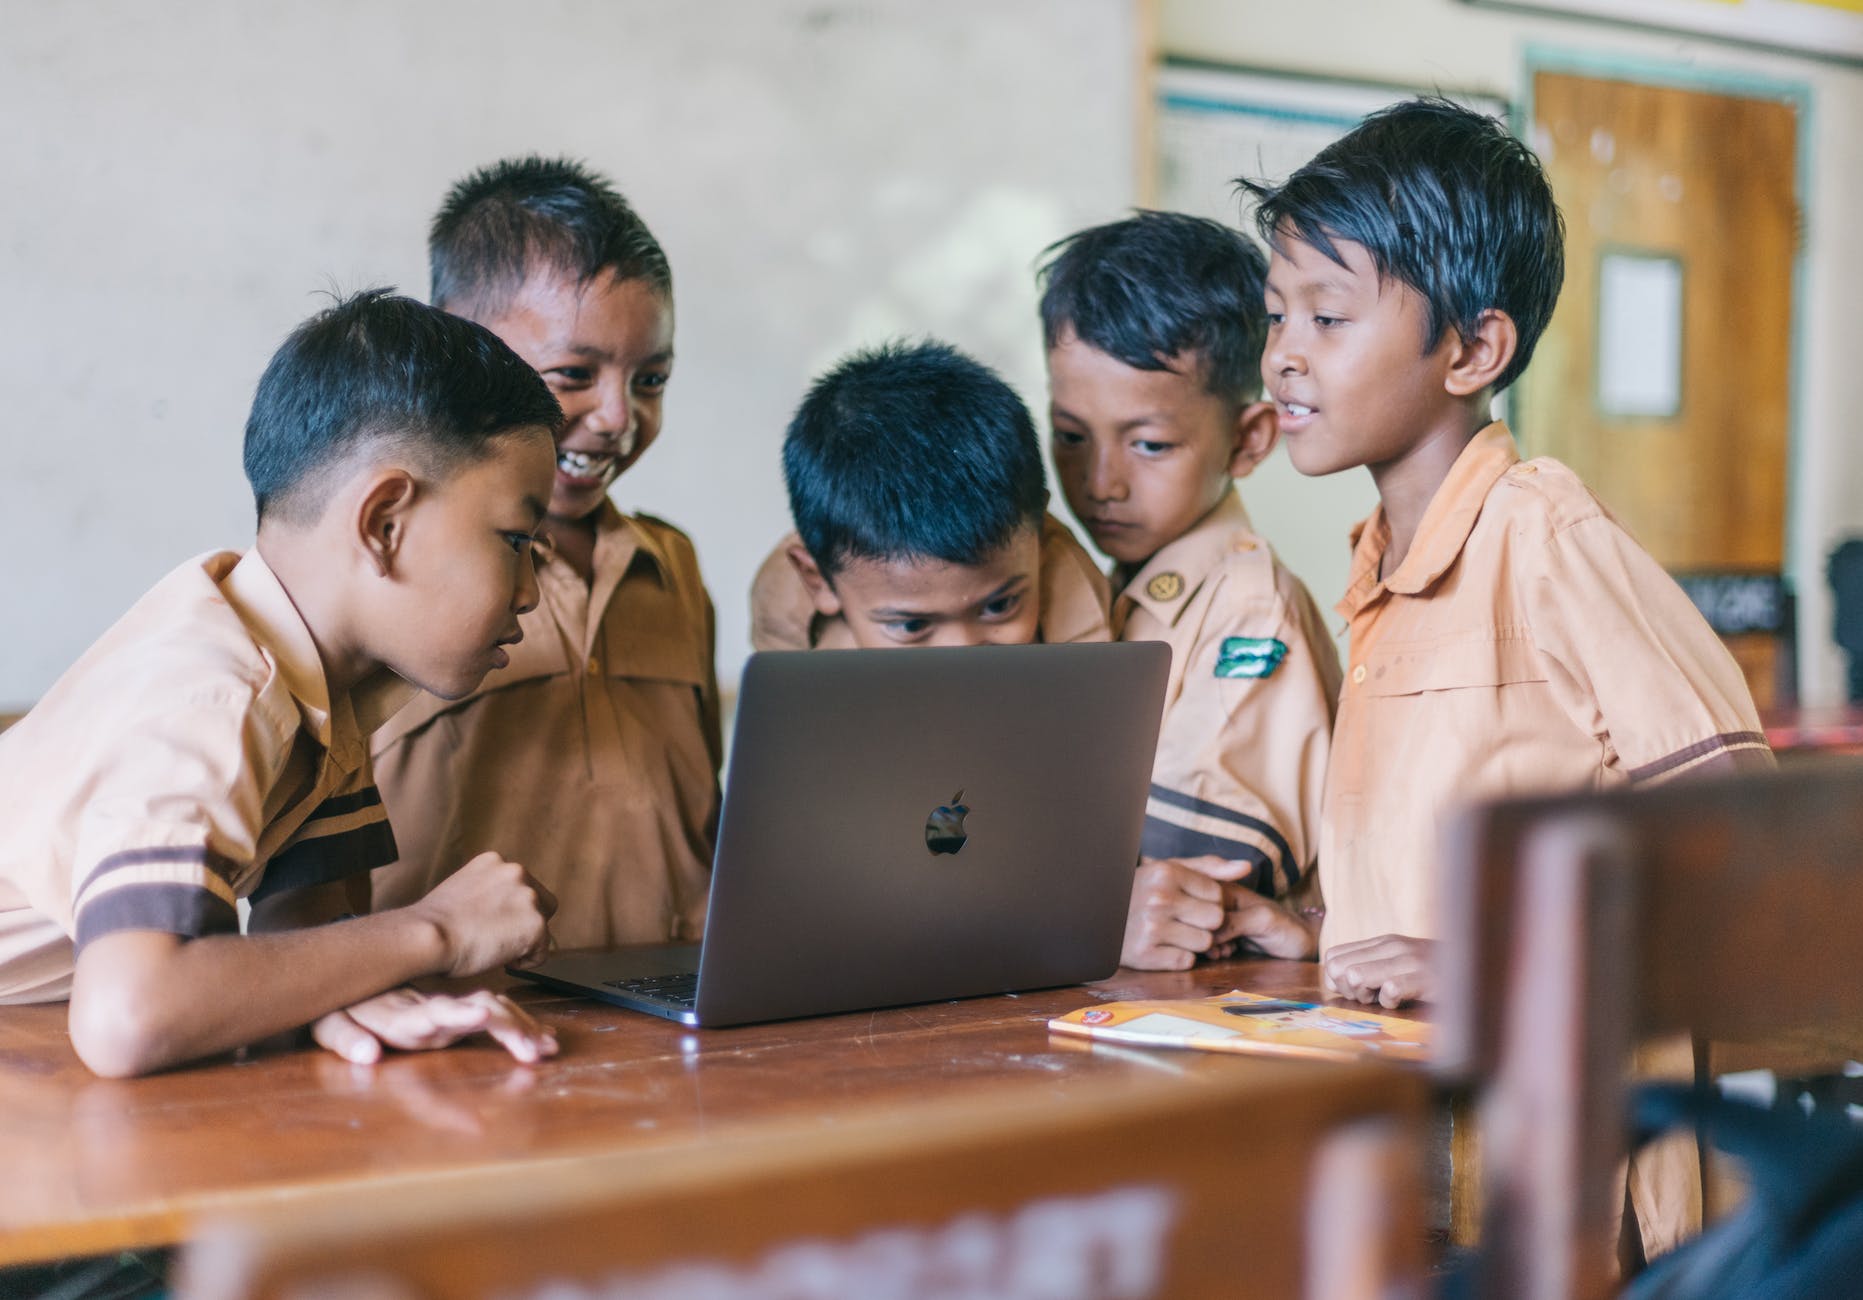
When I think about access globally, it makes me excited about how opportunities have grown for those in countries driven by poverty and war thanks to open education. However, it still makes me question how far we have yet to go to make education truly accessible to all. The pandemic put this into perspective for me. Students from my school were able to take a device home for online learning. However, this did not guarantee learning for all. Some of the barriers included, no internet, low bandwidth, a child not being able to log on independently because they were small, parents having to work and not being able to support their child’s education.
I don’t want to discount how far we have come. I believe open education is moving in the right direction. Global access to education is increasing. For myself, I feel very fortunate to have had opportunities to take courses from Harvard edX, listen to speakers from other countries to develop my skills as an educator, and complete my Masters of Education from home as I continue to work and live in rural Saskatchewan which was something not fully possible even 10 years ago. Connectivity to learning globally is growing exponentially. The Podcast featuring Sarah Kresh and Alan Levine provides a great example of how open education is working. I enjoyed listening to how moving away from textbooks to open access is impacting learning globally to remove financial barriers.
Open education is something that I can start with at a local level in my K-12 context. As an administrator, many of my students and their families struggle to make ends meet, therefore, I aim to remove barriers around a child’s educational experience. Some of the areas that I put first are ensuring food security during the school day, ensuring they have basic needs met, removing the barrier of having to purchase school supplies, providing opportunities for open learning through project based learning, accessing virtual guest speakers, and providing technology access to all students during the school day.
Open educational resources not only applies to higher education but I believe could make a positive impact on K-12 education. Teachers can utilize OERs to access free resources to use in the classroom and customize to meet the needs of individual learners. Students can gain access to information to learn and create innovative projects through technology which used to only be found in textbooks. However, part of digital citizenship is teaching students to be critical of the resources they find online to ensure it is reputable and factual. Open education allows students to develop their 21st century skills in a world dominated by technology.
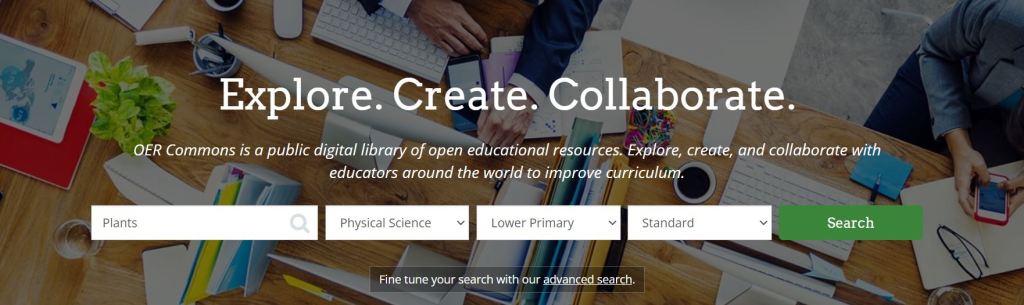
One of the best OER websites I found was OER Commons. I typed in the search below and found a wide variety of lessons regarding plants that teachers could tailor and customize for their students.
Educators no longer have to work in isolation. I believe collaboration and sharing resources is key to creating stronger systems in education. Teachers need opportunities to find free resources online, share resources with other teachers, and collaborate not only within their schools but look for other educators to learn from globally. In the early 2000s, professional learning communities were developing and growing in the world of education. However, due to budget and time constraints it started to lose momentum. I believe it is vital for educators to have opportunities to collaborate with others within their work day. Therefore, one of my goals for my school moving forward, is to plan and provide time for teachers to meet together weekly to learn from each other, share resources and collaborate to develop engaging lessons for students to access. I hope to help them navigate open educational resources to find new resources to support students and remove barriers.
Open education helps educators develop and grow their learning and educational resources. This in turn impacts the students we serve and even children around the globe we may not have even thought could get a chance to access education because of this movement .
Well, the good news is that my raised garden bed is built, but my oh my how am I going to fill it and what should I fill it with? Once again, living in rural Saskatchewan presented a bit of a problem when it came to finding what I would need for soil. Buying bags of soil was out of the question as I would have needed far too many and that was out of my budget since I had splurged on the cedar boards to build the bed. However, I did some research to try and figure out what type of soil I should use to help the plants grow. This article “Everything You Need to Know About Gardening in Raised Beds” provided lots of great tips about soil and planting in raised beds. Something I took away is that I would need to buy in bulk as I would need several yards of soil to fill my bed. I decided to buy dirt from a local business which was a mix of soil and manure. My plan is to add more nutrients to it every year to provide the plants optimal growing conditions. Here is video I found that is all about…well I’ll let you investigate!
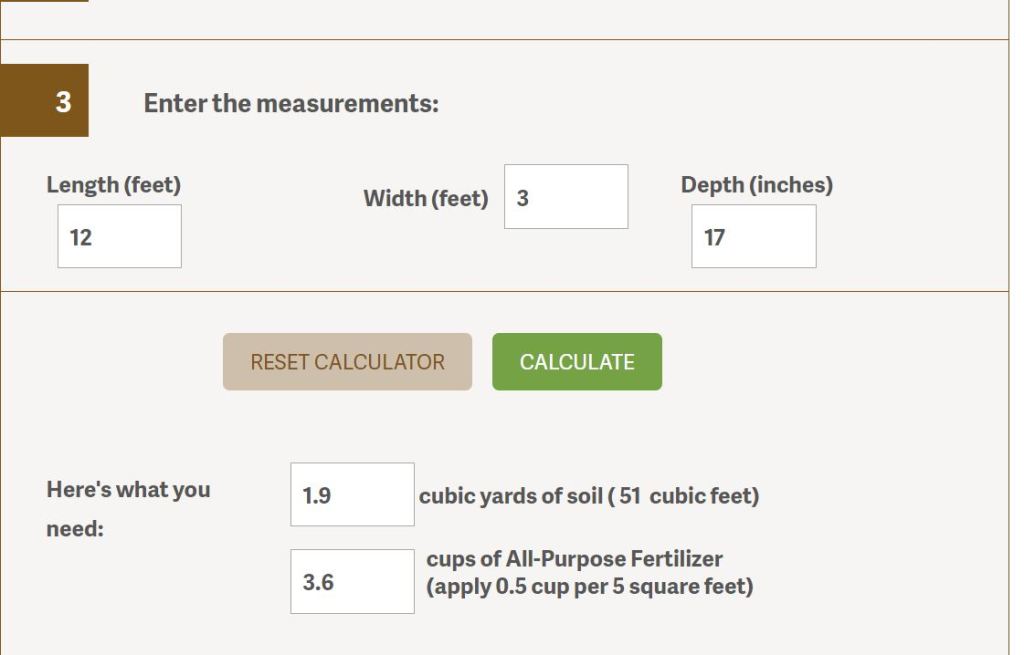
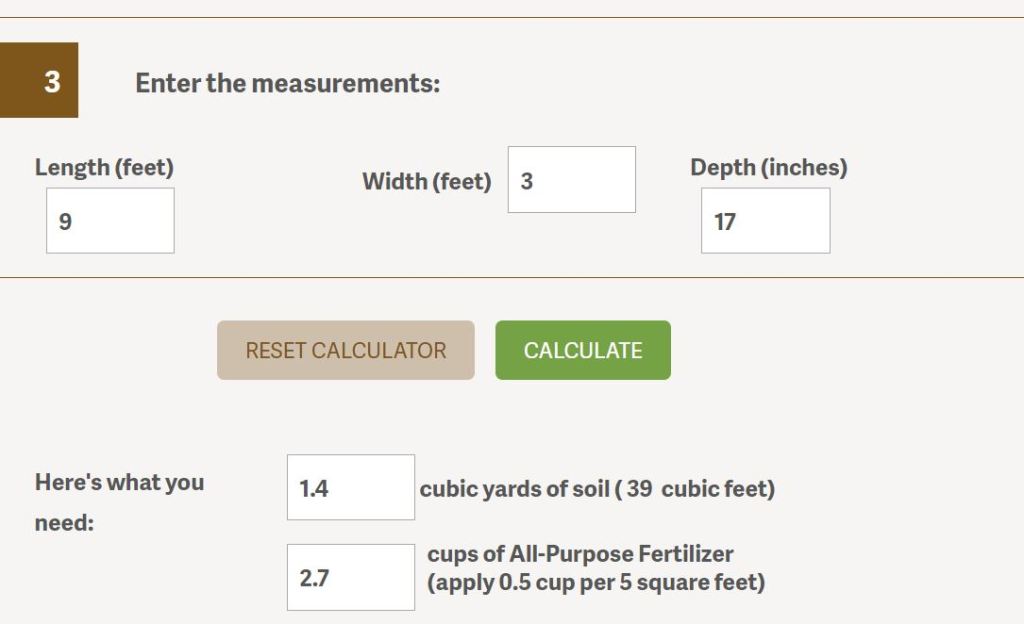
Along with my planning and designing, I have had to learn some new skills at math. I had to figure out how much dirt I would need. I found the Soil Calculator a great site for figuring out how much dirt I would need to fill my bed.
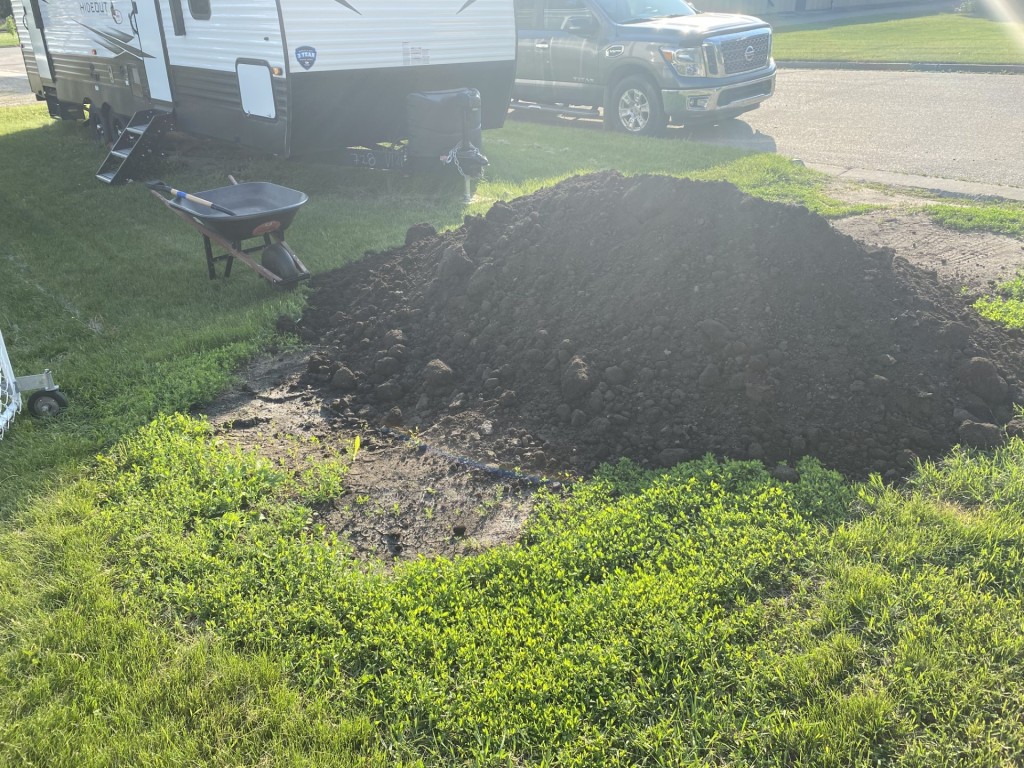
Oh boy! It turns out I needed around 3 yards of dirt. After work one day, I came home to this!
3 yards of dirt and manure mixture
Before starting to put the dirt in, I needed to take care of the grass at the bottom of my garden bed. I chose to put a layer of cardboard at the bottom for two reasons. First, cardboard will naturally decompose and become part of the soil. Second, I had used landscape fabric in the previous garden beds my husband built for me and now every year I am battling grass coming through at full force! This is a great video regarding the pros and cons of using cardboard in a garden.
Adding the cardboard in my raised garden bed.
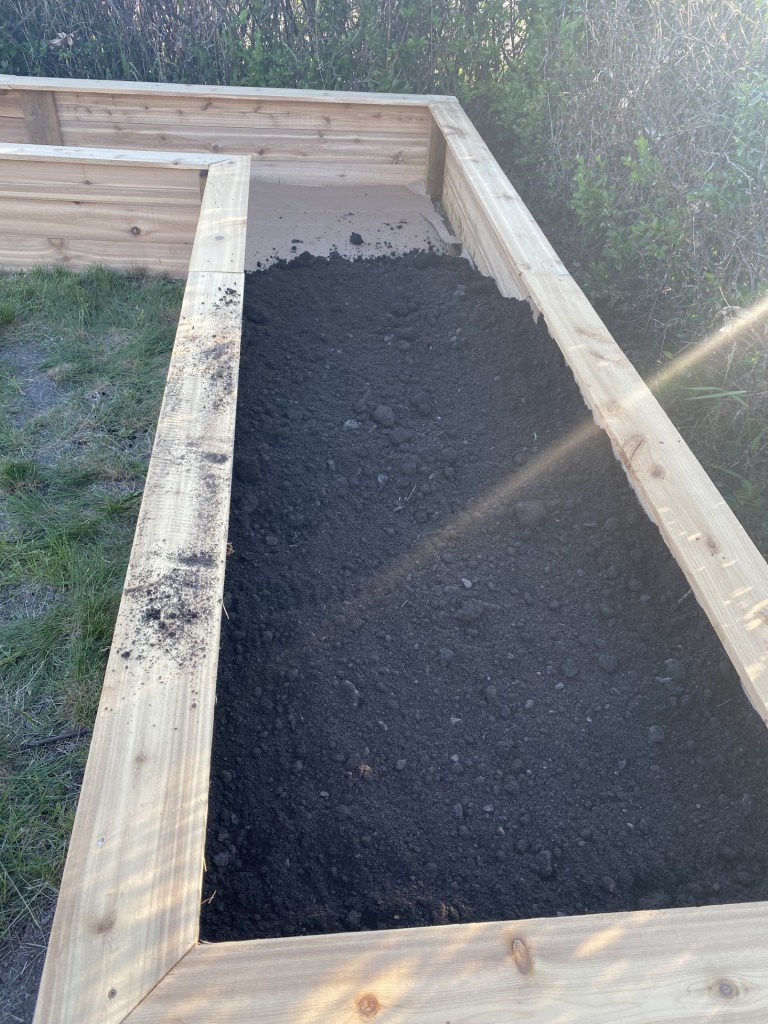
Once the cardboard was laid down, it was time to get busy loading, hauling and dumping the dirt into my raised bed.
One evening worth of work!
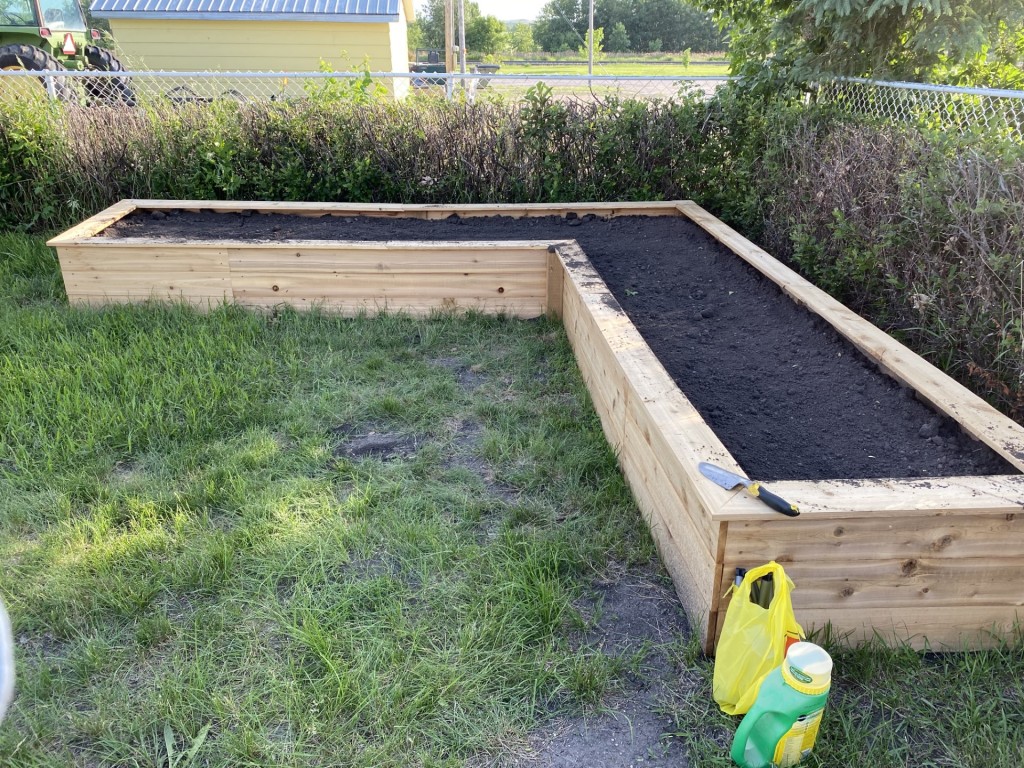
It took two evenings to fill the garden bed! I was so happy to finally start to plant!
Time to plant!
I have big future plans for my raised garden bed to become a spot for fruit bushes such as strawberries, raspberries and rhubarb but this year I was not quite ready to tackle this plan. So, I decided to start small. I chose to plant tomatoes and peppers of different varieties along with some flowers and a shrub. One plant that I had heard great things about to include in gardening was the marigold thanks to Laurie’s blog. I always wondered why my grandmother included them in her garden every year. Here is a short video that shared 6 reasons you should plant marigolds in your garden.
After purchasing my plants at different greenhouses, I set out spacing them out first before planting them in the soil. This is something, I would do again in the future as it gave a great visual of how much space each plant needed to grow. The soil was very workable and easy to dig and plant in. Here is a video with my raised bed finally planted!
The raised bed is planted!
Overall my learning project went well. So things I hope to do in the future to make it even better based on my research is:
Adding more minerals and nutrients to the soil
Looking into watering systems
Researching how to grow fruit in raised garden beds
A couple of things I need to remember in the future:
Remember you live in rural Saskatchewan, products and resources aren’t readily available
Think about where your garden is located in proximity to a watering source. It is going to take all of my garden hose to get water to this raised bed.
Start early thinking about plants. I was not able to get all of the plants I wanted in my garden bed as I was late at planting this year.
Up next week, the final wrap up of my major learning product which will include adding some mulch to help with soil moisture! Thanks for reading. I leave you with a youtube short I was playing with this week!
What better a day to start building a raised garden bed then in +30 degree weather, right? However, June is here and the learning and building must go on! So after a slow start to the morning, I began my raised garden build. As I mentioned in my previous post, I am going to be building a garden bed that is 12 feet long on each side using 6 foot cedar fence boards. It will be 3 feet wide on each end so I can easily reach the plants. Although, I found many different ideas and plans online, I wanted to create my own drawing and design to fit a certain area in our yard. Here is a reminder of my design:
I spent some time looking at raised garden bed videos and plans to decide on how to tackle this project. I especially liked this video as it had similar materials I chose and the look I wanted.
The website trees.com had a great read about 24 DIY Raised Garden Bed Plans & Ideas That You Can Build In Your Garden. Each plan shared the difficulty level and when you clicked on the plan you liked the materials and instructions were included. This would have provided me a great way to start my building but instead I kind of went rogue with my learning and designed my own raised bed plan. After gathering all of my materials, this is what I used for the build:
32 cedar fence boards (plus a few more for errors)
decks screws
old scrape boards from treated wood to secure the fence boards
cordless impact drill
compound mitre saw
measuring tape
pencil
lots of water
a great supervisor and supporter! (my personal husband)
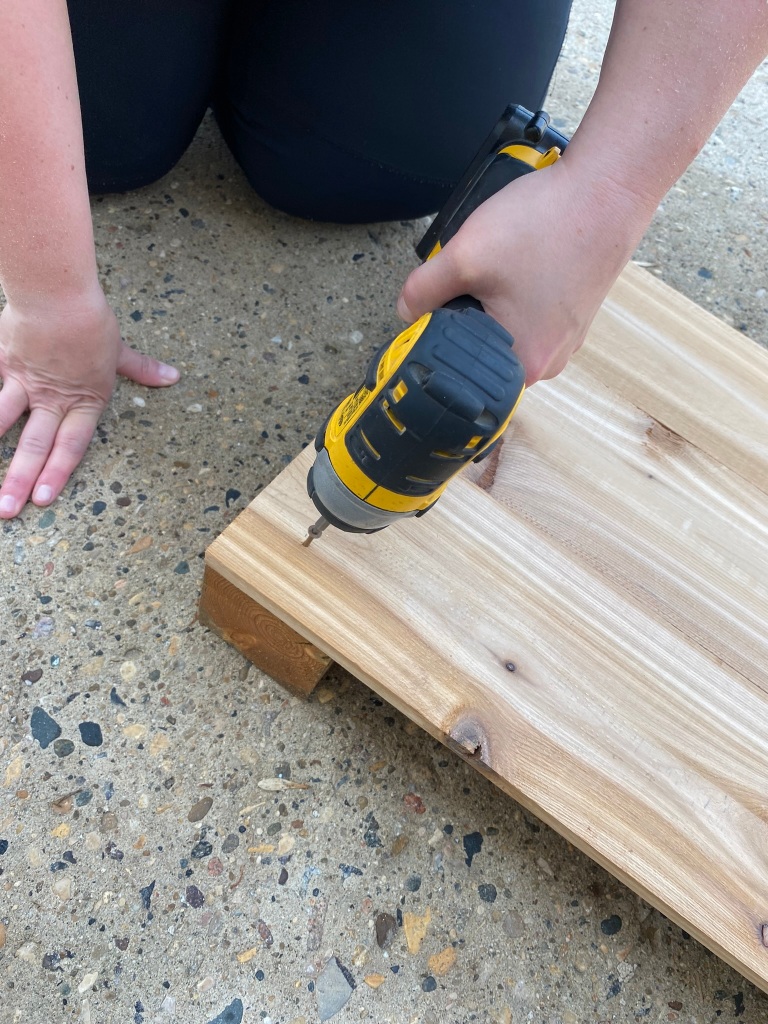
To start, I began by cutting my end boards from 6 feet into 3 feet lengths.
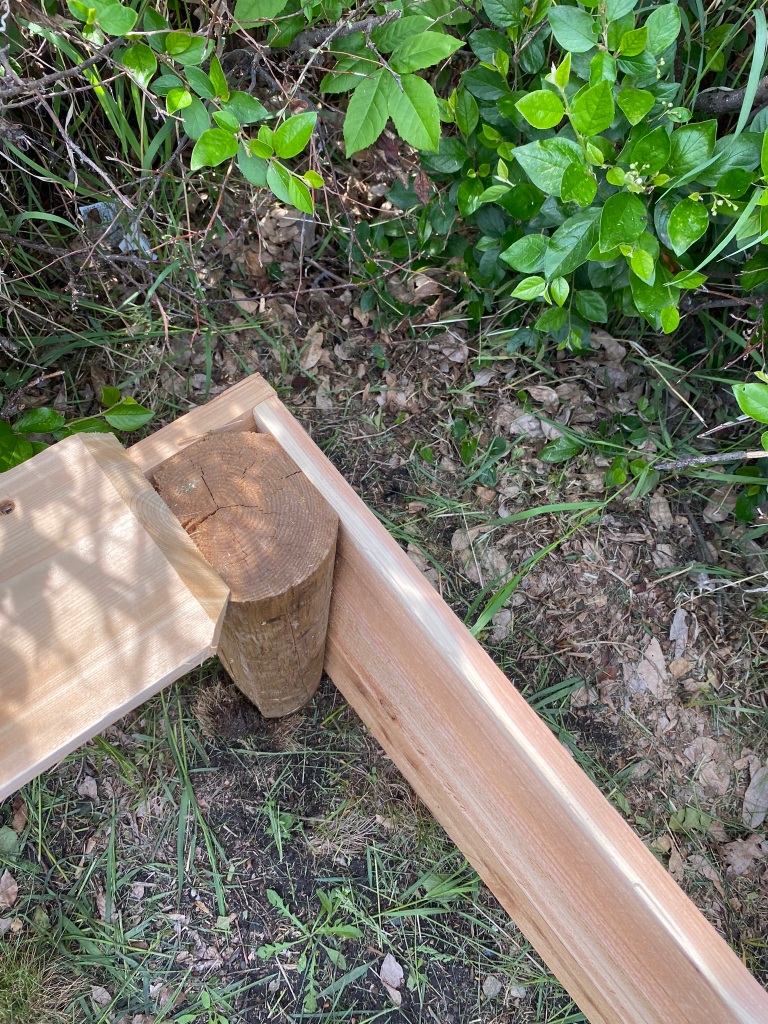
Then I started to connect the sections together. For this, I used some treated wood scraps that were in our garage as anchors for the corners and to connect the 6 foot boards.
I started the build on our driveway but felt it was going to be too heavy to continue there so I moved over to the area I wanted the bed to be placed in. In hindsight, I should have continued to build on the concrete as it was a more leveled surface. Something to remember for future builds!
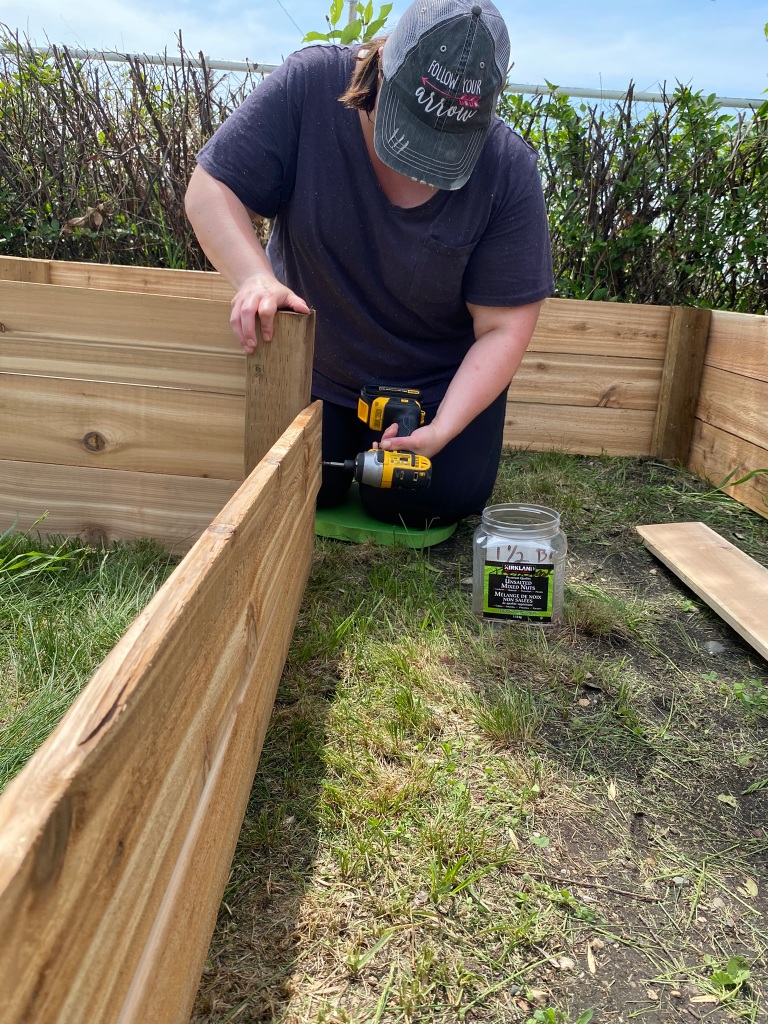
The build was going quite well, however, I could feel my husband cringe every time I used the impact drill! I spent most of my time the previous week practicing on the mitre saw and I definitely should have spent a lot more time using the drill as you can see in this video!
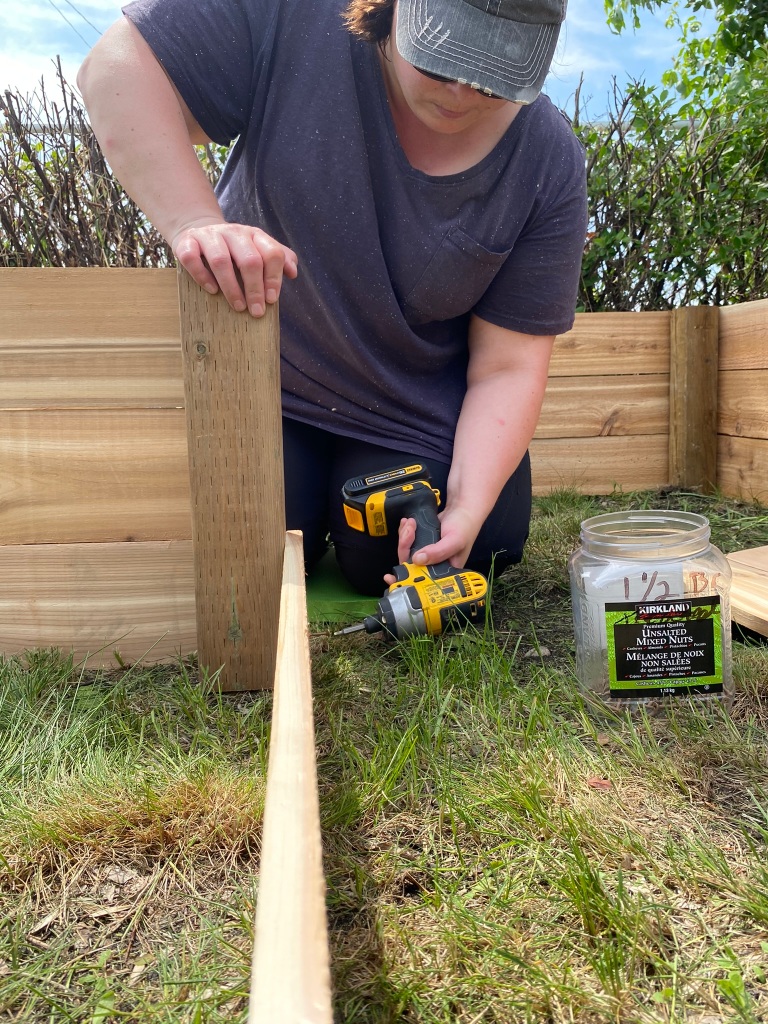
This build was a two person project. I needed support holding boards and piecing each section together. The main part of the garden bed took several hours to build but seemed to go together well.
After a short break, I was back at it! Time for the finishing top caps. I felt very optimistic as I had practiced making angles the week before and they seemed to work out. This video was a great watch for learning how to make angles. Unfortunately, it didn’t give me any tips for how to correct errors when cutting angles.
Well… I soon discovered this was not going to be a smooth end to my build! Angles became my nemesis! They started out well but then they no longer seemed to go together. I had to be careful as I was nearing the end of my supply of cedar boards.
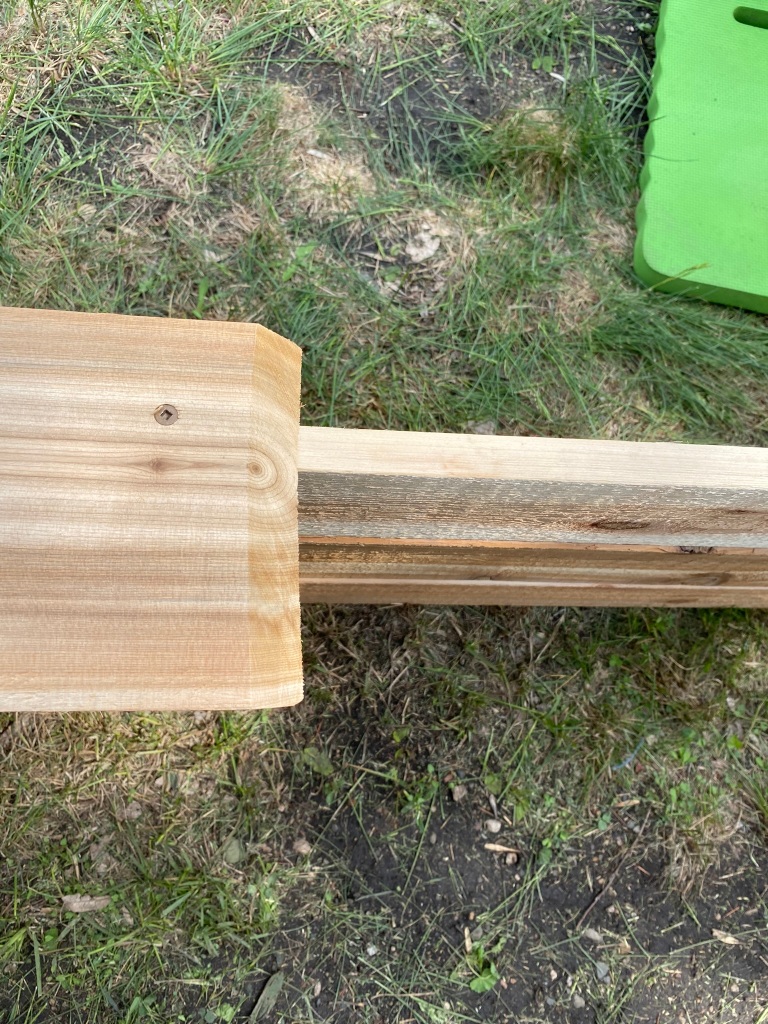
This 45 degree angle went together alright at first!
This bevelled angle also worked out!
Slowly my angles began to no longer fit quite right! I was persistent in wanting to do it myself so my husband tried to offer support and advice without taking over my project, kind of like a teacher in the classroom would! Unfortunately, I had to enlist his help to save the remaining boards so I wouldn’t run out!
Something isn’t looking right here! Grrr…
Please fit together before I run out of boards!
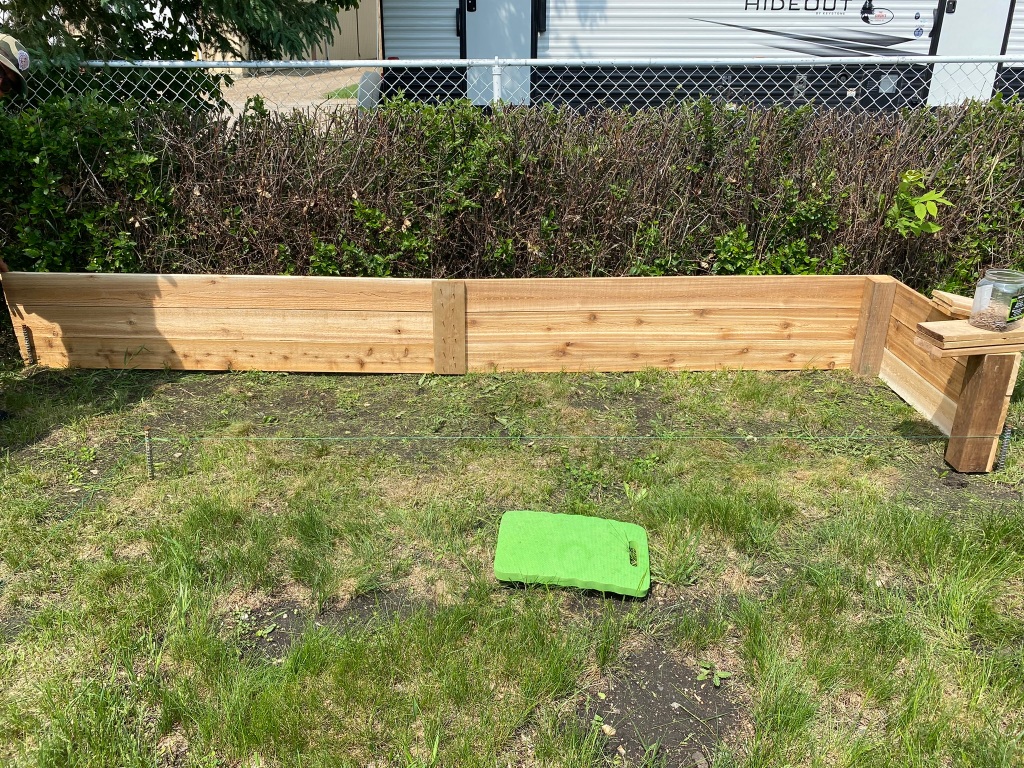
With a little help, I pieced together the remaining corners and accepted defeat regarding making perfect angles! Oh well, I do need to put my pride aside and recognize that I am a rookie in this area. Finally after a long, hot day my build was complete!
Final build review!
A few things that I am taking away from my learning this week are:
Take into account that watching videos and reading articles does not equal being able to develop a skill.
Developing a skill takes time and practice
Always have extra material on hand!
Be aware of uneven ground and boards that have warps in them
Give yourself lots of time! I thought it would only take half a day but it actually required the full day to build
Give yourself grace as you learn a new skill! Be proud of what you accomplished without looking at all the flaws!
I did find that watching videos for me was much easier than reading how to build a raised garden bed. I gained lots of tips about the build such as materials and how wide to make it! Up next, I will be looking into how to fill the raised bed, what type of soil will work best and what kinds of plants I should put in the bed.
If you have any recommendations on filling my raised garden bed, I would love to hear them!
Thanks for reading and watching my raised garden bed build!
This week we have been discussing social media activism and our role within it. Three questions were posed to think about and answer.
Can online social media activism be meaningful and worthwhile?
Is it possible to have productive conversations about social justice online?
What is our responsibility as educators to model active citizenship online?
Social Media Activism
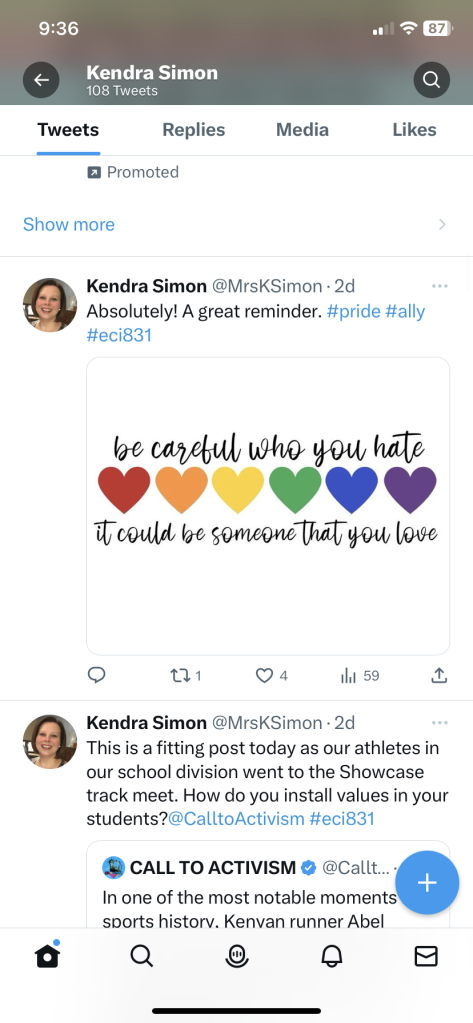
I’ll admit I have a had a strong fear of putting my beliefs and values out on social media even though I readily share them on a daily basis with adults and the students I work with. I try to be a good model of human rights equality and an ally to LGBTQ and Indigenous communities. Previously, I had been taught to keep my social media accounts private and neutral so that I would not face backlash or repercussions from superiors who may see my posts.
However, I became increasingly uncomfortable with social media activism during COVID. I found that I no longer enjoyed going on feeds because people always had an opinion about a topic and huge divides were happening based on what you believed regarding vaccines and mask mandates. It didn’t stop with COVID related topics. People I had known for years seem to be growing in their bravery to share their own beliefs that I found racist, privileged and very oppressive. Each day I was contemplating whether or not to respond but figured it would be an argument that wouldn’t get anywhere to make lasting change. From our class discussion on Monday, June 5th something Katia said and wrote really resonated with me and made me want to start to change my social media habits for the better. “Silence speaks just as loudly as words.”
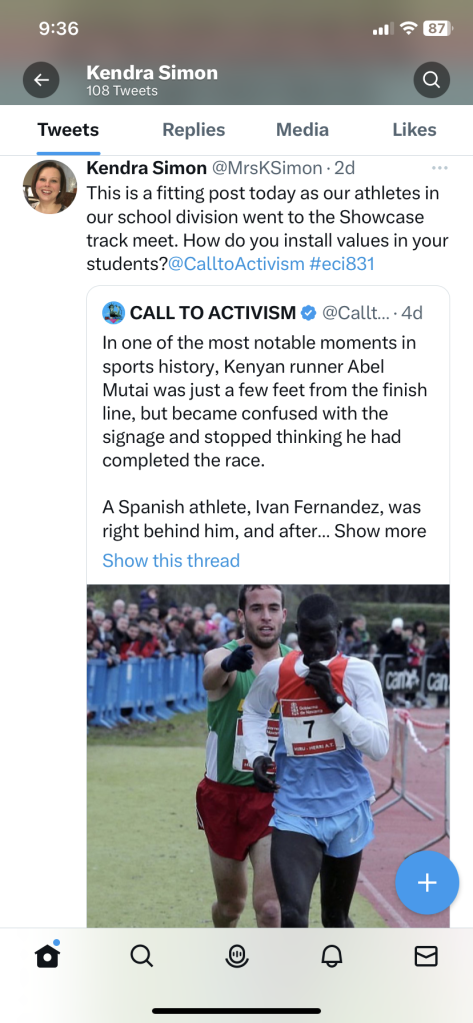
I wondered what my social media platforms were actually saying about what I stand for and believe. I took a look at my Twitter account and I found that I was doing a lot of retweets, sharing and liking of educational resources but nothing too thought provoking to stand up for my beliefs or bring about change so I decided to try to Tweet more purposefully this week around social activism and share items I wish to see change in the world.
These three posts are topics I strongly believe in and talk about face to face with others so why wasn’t I sharing them online as well. I believe they are worthwhile and need to be sent out to the world. I realize that I have a long way to go with social activism online but I do see the value and importance of it. If I don’t try to use my platform for change as an educator and mother, what am I teaching my students and child? The article Social Media: The Catalyst For Creating Social Change?by Michael J Mc Cusker suggests that we need to “understand you’re why, and speak with knowledge of the issue. Adding value is crucial. Putting yourself out there is the only way to get heard” (Mc Cusker, 2021). My why is to help make a better world for my students and child to live in that demonstrates love and respect for all instead of hate and divide. Therefore, social media activism is definitely meaningful and worthwhile.
Having Productive Conversations Online
I think that you can have productive conversations online if you are cognizant of the platform and arguments you may face when you put out a question or topic that could be challenged. I feel that Facebook is not the platform for productive conversations. People do not seem to be trying to bring about positive change on their platforms and tend to either agree with you or argue as to why they are right. However, Twitter seems to be a stronger space to invoke productive conversations online. The accounts I follow will often pose questions or share topics that naturally lead themselves to open discussions and conversations. Twitter chats such as #saskedchat provide meaningful opportunities to support online conversations. The blog post 13 ways to start a conversation online by Elizabeth Perry provides some helpful tips for getting started with conversations online. Some of the highlights and takeaways included:
Joining online forums where people share common interests with you
Being authentic and vulnerable
Developing your online profile to be similar to your real life personality
Using conversation starter prompts to get started
Being patient with responses
Just like in person connections and relationships, it takes time to develop and grow your online community. Having meaningful conversations online is something worthwhile to explore. You may meet and learn from someone across the globe who you might otherwise never knew existed. However, there may be times when you are challenged by people who do not share your stance on a topic or trolls that insert themselves in your feed. Being able to know when to stop this unproductive dialogue is key. People can disagree on topics but it shouldn’t be at the expense of someone’s mental health or well-being. This is something to remember when teaching students about their presence online.
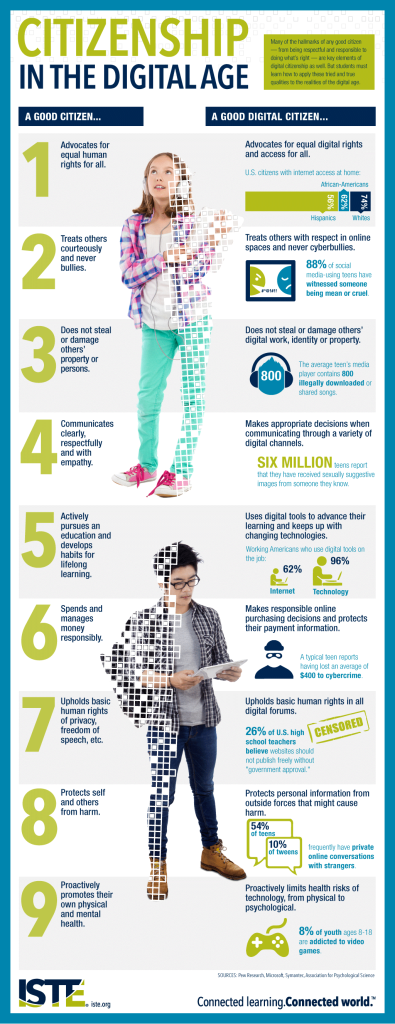
Just as when we teach a new concept or idea in curriculum we need to model and scaffold digital citizenship in respect to social activism. As an educator today, it is my job to be informed and understand how technology and its use by our students is impacting the world. A great way to start with all students is to engage in the topic of digital citizenship. The article “What is Digital Citizenship and Why is it Important?“ from usidhr.org provides a great starting point for educators to understand digital citizenship and why it is important to teach. Students must be taught that what they put online should be thoughtful and promote human rights not spread hate or false information. Without guidance, students do not have the knowledge that what they are doing online can have significant negative effects and impact others. Just as we teach our students that words can hurt and not be taken back, so to can the messages, pictures and posts we put online. Therefore a scaffolded approach through teaching digital citizenship is vital to support student learning in this area. A great tool to use would be Digital Citizenship Education in Saskatchewan Schools.
Students use technology more than ever so educators must work to model and teach skills about being a good citizen online. Students need to understand that their presence online can help do great things in the world like bringing about change for equality through social activism. However, being a responsible citizen online is key to ensuring what they are putting out online will not be detrimental to someone else.
As educators and leaders, we decided to go into this profession to impact students and the world. Therefore, being models of social activism and responsible citizens online will provide our students with the knowledge and tools to become capable and competent digital citizens who use their voice and platforms online in a positive and safe way to bring about change in the world.
What do you do to model social activism to your students? What does your online presence say about you?
I have been a on Twitter since, March 2017. I attended a conference with two of my colleagues regarding how to be a better educator. One of the speakers was George Couros and he challenged all of the educators in the room to join Twitter to start creating an online presence and connect to other educators. One of my colleagues and I accepted his challenge and joined immediately! After joining, I wasn’t really sure what to do next. I started following the people from the conference and occasionally sent a message back and forth with my coworker but that was where my Twitter usage stayed for several years.
When I became a new Administrator, I started to follow more educational leaders to gain insight into how to become more effective in my new role. One of my favourite leaders to follow includes @joe_sanfelippo who shares his #1minwalk2work. I have used his work to not only motivate myself as a leader but my staff each week.
Other leadership accounts I follow include @PrincipalProj and @JonGordon11. I have enjoyed finding ideas and strategies to use within my role as a leader to help strengthen my skills and support my staff.
I would say I am skilled in the retweet! This was primarily how I have shared information I have liked up until the Winter of 2022. When I embarked on completing my Masters of Education, the second class I took was EC&I 834.
Dr. Katia Hildebrandt was my professor and she had us get onto Twitter throughout our class. I very much enjoyed following my classmates and reading their posts. During this class, I learned a lot about #edtech and started to follow leaders in educational technology such as @alicekeeler and @catlin_tucker. These two accounts helped me grow tremendously in my skills around educational technology by giving various tips and strategies to use educational tools in the classroom more effectively.
During this class, I started to link my blog posts to my Twitter feed and began to receive comments from not only my classmates but other users within my school division and the educational world. Twitter became a great professional learning network for myself during this time.
Well, here I am again taking EC&I 831 with Katia. This term I am learning from a whole new group of classmates about social media and open education. I am enjoying the interaction through posts and links my fellow learners are sharing. I am also becoming braver and better at creating my own tweets. I was a fangirl this week when I shared a post from @alicekeeler and she thanked me for sharing it! Overall, I have found many strengths and a few challenges with my Twitter usage that I can share.
Strengths:
Building a professional learning community
Learning from colleagues and educational leaders globally
Finding strategies and ideas to use to better my skills as an Administrator
Challenging my current practices and helping me develop as a person and professional
Connecting with educators across the province who I would not otherwise have the opportunity to work with or learn from
Challenges:
Creating an eyecatching tweet
Learning how to create a concise tweet (I am wordy!)
Linking other accounts and hashtags to my posts
Finding time to sift through the information on Twitter
I think when I joined Twitter early on, I would have benefitted from doing some research to help develop my tweeting skills. This article from sprout social would have helped me develop on my skills on Twitter early on. This video has 5 great tips to help make your Twitter experience better.
Although, I have lots to learn still about being a Twitter user. I am no longer apprehensive to share and connect on Twitter. I love the sense of community it is creating as a professional platform for myself. I am looking forward to trying something new such a taking part in a Twitter chat. I will continue to use Twitter as my professional platform to learn and grow as an educator and leader.
What do you use Twitter for? Do you have any recommendations of accounts to follow in education and leadership?
Finally, if I don’t follow you already please find my on Twitter @MrsKSimon and I will be sure to follow you back!
After gathering all of my materials, the time has come to become familiar and conquer my fear of certain power tools namely the compound mitre saw (which I had to ask my husband to give me the correct name for). Before actually using the tools, I thought I should watch some educational videos to prepare. This basic safety video was a great reminder of things to remember when working with wood and tools. It was a bit of sober acknowledgement of how you must be very safe using saws as it could quickly turn into something horrific!
An easy to follow cartoon video about safety tips in woodworking
I also watched this video by Weathered Wood Home on how to use a power drill which I have used before but not often. I feel that this tools will be easy to use and won’t require too much practice!
Now, it was time to look into the mitre saw to gain some proper insight as to how to work it. This video was a straightforward introduction to the saw and had great safety tips to go with it.
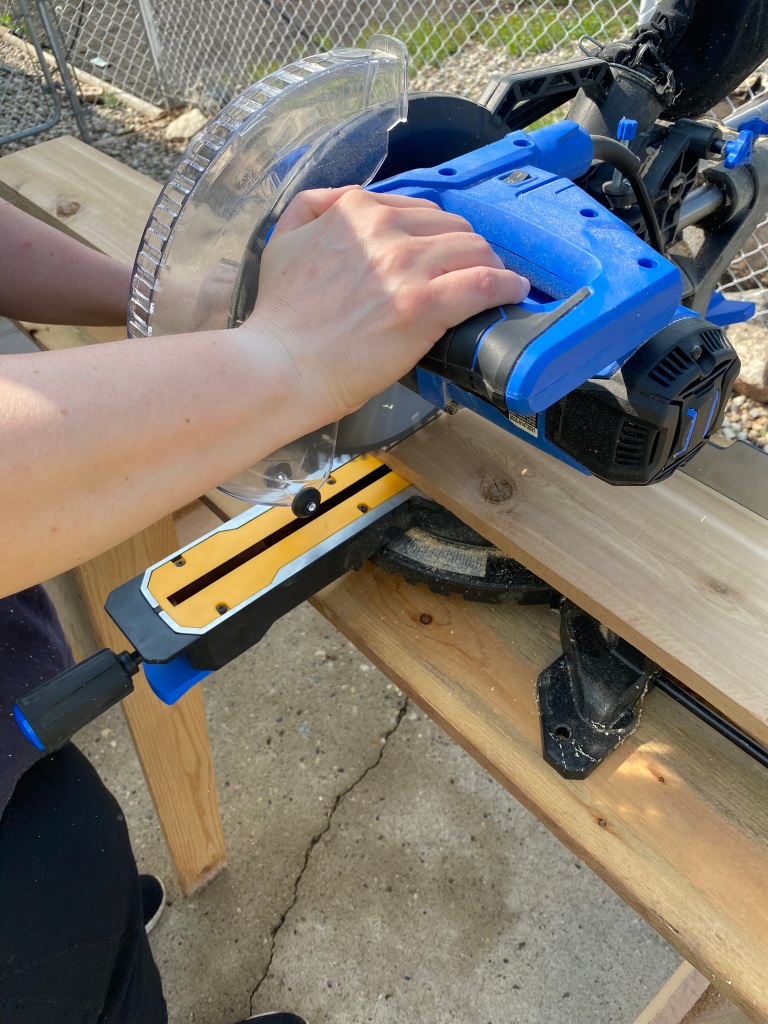
Although, these videos were great starting points for using power tools, I found it best to learn side by side with someone skilled in using these tools aka my husband. I felt pretty confident in my skills using the hammer, screwdrivers and cordless drill so I felt my time was best spent becoming comfortable with the saw. As you can see by my face, I wasn’t very confident in using it when I began.
My heart was pounding!
Although, I did pretty well with my first try, I still needed to trim a little off the edge to get the correct measurement I was practicing.
Starting to feel a bit more confident!
Since, I want to put a cap edge around the top of my raised garden bed, I also need to practice making angles.
The more I practiced using the saw, the more confident I became! Combining the safety knowledge and tool usage I learned through videos with hands on practice was an effective way to learn. In this learning journey, pairing the knowledge with the practical application of hands on tasks helped me develop my skills in using power tools. I believe you can’t have one without the other. If I had just watched videos and read articles around tool skills, I don’t think I would have been able to just simply pick up the tool and build. I also think that if I had just jumped in without watching the videos, I wouldn’t have gained some valuable knowledge around using power tools and safety before starting.
Next up… time to build! Hopefully the weather will cooperate for me to spend a good chunk of my weekend, building my raised garden bed. Stay tuned!
Thanks for reading! Please let me know if you have any building tips for my raised garden bed and/or have ever built your own.
I’ll admit that I really had no idea what Tik Tok was when I created an account over a year ago. I kept hearing about it from colleagues and students so I thought I would check it out. However, fast forward a year, I still feel like there is a lot more to discover about the social media platform. First, I thought I would do a little historical research to figure out more about this worldwide app. Brandtastic’s blog gave a great overview about the history of Tik Tok. Some interesting facts I learned was that it was created in 2016 as a lip sync app in China. In 2022, over 60% of users were under the age of 25. Tik Tok is not without controversy as it has been pushed towards being banned in the United States and off of government employee phones. However, it continues to be one of the dominating social media platforms in the world.
All I have used it for is watching videos which in the evening can turn into a full hour session in an instant! I still have not made my own videos and truthfully don’t think I ever will! If I were to take the plunge, this getting started video would be very helpful to those just starting out on Tik Tok, though.
I learned from this instructional video that to create a Tik Tok video it is a three step process of recording, editing and posting. However, the process of adding filters and music seems to be daunting. I am more in the discovery phase of Tik Tok. After downloading the app, I used it solely on a personal level to watch funny videos at the end of the school day or check out a trend a colleague or Professor suggested such as Pot Roast’s Mom.
However, recently I have started to explore it professionally as well. I have found many helpful tips and even funny videos on #teachertiktok. Some of my favourite accounts to follow professionally on Tik Tok include @farmerlovesphonics who has helped me research and provide strategies and instructional practices to staff that align with the Science of Reading. I also enjoy the tips and ideas regarding addressing challenging behavior and social emotional learning from @behaviorconnection. These accounts are just a couple of my top followers for professional use.
Something new to me as I explored Tik Tok further this week was creating collections. This is a feature I found very useful instead of simply saving them to favourites, you can create categories. This week I created a gardening category to support my major project for this class, a general school collection for professional ideas and a motivation collection that I could use with students and staff during discussions and meetings.
Speaking of students, I was thinking about how Tik Tok could be used safely, to support student learning. I would probably use some of the motivation videos in lessons with students to support social emotional learning. I might also use funny animal videos to increase engagement. As I currently work with younger students up to Grade 4, I believe this would have to be mainly teacher controlled. As I sit in my office at school, I can’t seem to get onto Tik Tok at the school which makes me wonder if it is blocked for usage at the school level. This could be a problem when trying to use it for educational purposes. However, with older students, perhaps you might engage them by challenging them to create a video for a project or topic they might be learning about. Again, strong guidance and safety protocols would have to be adhered to as many parents may not feel comfortable with their child using Tik Tok.
So, after reviewing the social media platform, I still have many questions about how to use Tik Tok appropriately in schools. As a mom of an 11 year old, I am working to teach my daughter digital citizenship and internet safety but she still believes a lot of what is out on the internet even though it might not be factual. Therefore, for the students I work with I would primarily use it as an option to share appropriate videos with them during a lesson or on google classroom. I will continue to use the professional ideas and accounts I have found within Tik Tok to support my role as an Administrator and Teacher. I will continue to use Tik Tok both personally and professionally as a place to watch interesting and humorous videos. I like to check out the newest challenges such as #skipping challenge. However, the next Tik Tok star will not be me!
I would like to know your thoughts on Tik Tok. How do you use Tik Tok on a professional level? Do you allow students to access it? What are some of your favourite Tik Tok accounts to follow?
The long weekend seemed like a great time to start planning my raised garden bed build. I always get the itch to start planting and greenhouse shopping around this time. I really need to reign myself in and budget wisely otherwise I could easily end up with way more plants than I need. I believe this approach will be needed for planning my raised garden bed as well.
I started by researching the best types of wood to use for my garden build. I went straight to my favourite planning social media platform Pinterest. I had already started a board titled “Gardening That I Love” so I decided to browse and add to my search of what type of wood I should use to build the garden bed and any designs I liked. I especially enjoyed this blog post from Deanna at Homestead and Chill titled “7 Ways To Make Wood Garden Beds Last: Nontoxic Sealer & More”. I decided that I wanted to use cedar as I thought it would be easy to find. Boy, was I wrong! Rural Saskatchewan it turns out is not the best place to shop for cedar. I spent most of Saturday morning calling local lumber yards all within an hour of my home with little or no luck in sourcing cedar fence boards.
In the midst of this calling adventure, I began looking at different designs that I might like to use as inspiration or plans for my own raised garden bed. The look and simplicity of this design was something I was really interested in.
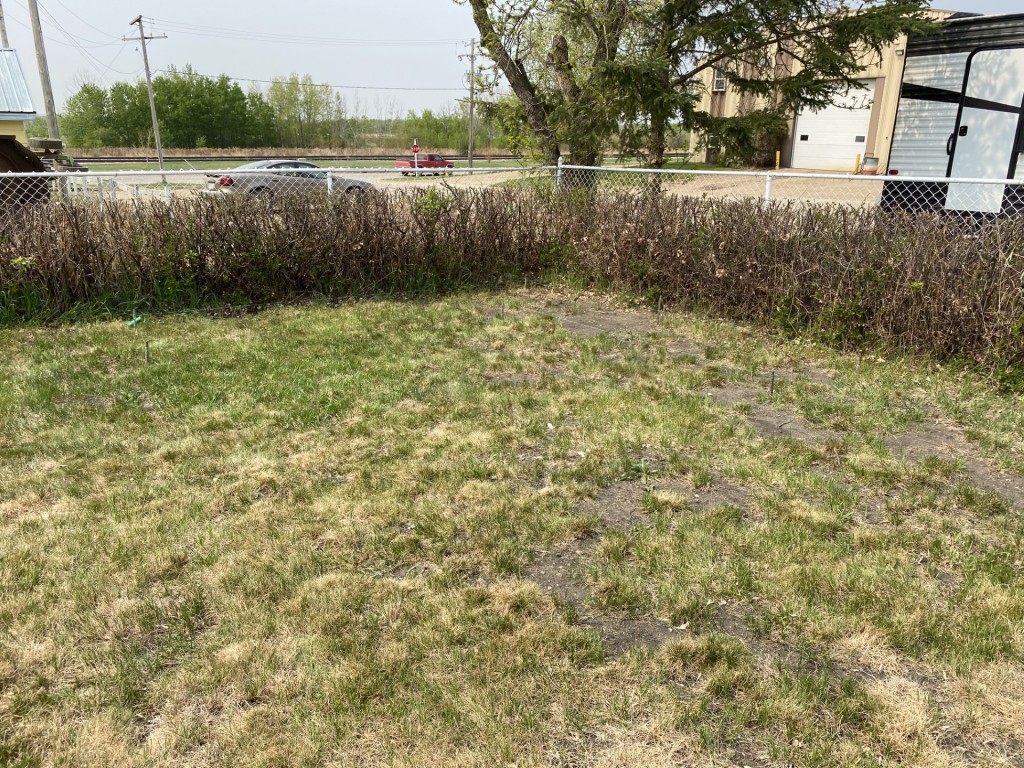
However, the location I chose in my garden area was a corner section where the grass was spotty and the land was flat. Therefore, I wanted something that would meet in the middle providing a garden bed on each side. I did not have any luck finding a design to match the area I wanted to build the raised garden bed in.
Area to build my raised bed by Kendra Simon
I guess it was time to design my own! After calling around to several places, I finally found luck in Regina sourcing 6 foot cedar fence boards. Using this information, I planned my design around using the 6 foot cedar fence board for my original plan. It seemed to resist rot and was budget friendly upon my research.
Garden Bed Design by Kendra Simon
Now, I wondered what this design would truly look like plotted out and when I would be able to get to Regina which is almost 3 hours away from where we live. So, I started by plotting out my design, with a little help from my husband! The visual provided great clarity as to whether or not my design was what I was looking for. It turns out, I wanted to make some adjustments to my original design as noted in this video.
Updated Drawing of Design by Kendra Simon
I realized that 6 feet did not provide enough room on either side for a large amount of space for plants to grow and develop. It would really limit the amount of plants I could put into the raised bed. Adding an additional 6 feet on each side seemed to be the best plan to go with. Now, all I needed was a plan to get the wood! I called a few family members to see if they were going to the city soon. However, no one was planning a trip. So…with no big plans for our family this weekend before our weekends become full of sports events, we decided to take a Sunday road trip to Regina for wood and a few other household items.
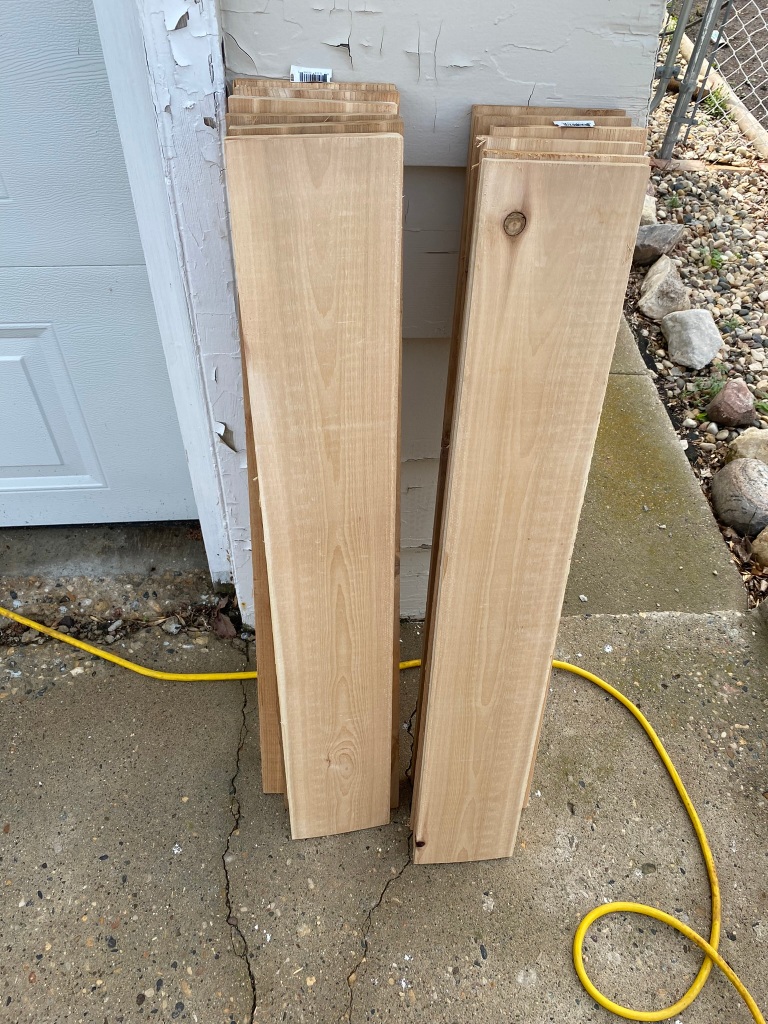
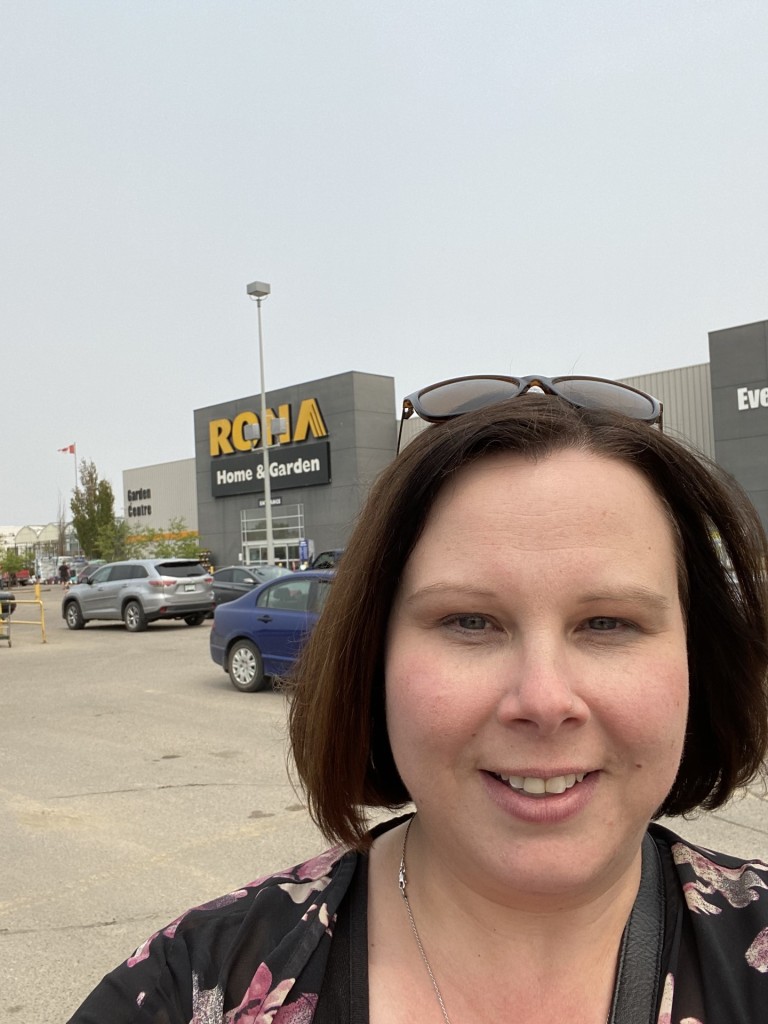
Doing a little price comparison, we found that Rona seemed to be the best deal in the city for cedar boards. I am thankful for the knowledge my husband has in this area as I was given a mini-lesson on picking the best boards for the project. Each of the 36 boards (a few extra for good measure) were inspected to ensure they were not warped or cracked. After combing through two different bundles, we were able to pay and load up!
After, accomplishing our task, we couldn’t resist a little stop at McDonald’s for our daughter and of course Costco for the whole family. These are luxuries to those of us who live in rural Saskatchewan!
The next steps in my learning journey will be researching all about safety when using power tools and actually practicing before trying to cut into my precious cedar boards! Stay tuned for my next post about how I overcome my fear of the power saw. Let me know if you have any tips or suggestions to help me along the way to building my raised garden beds.